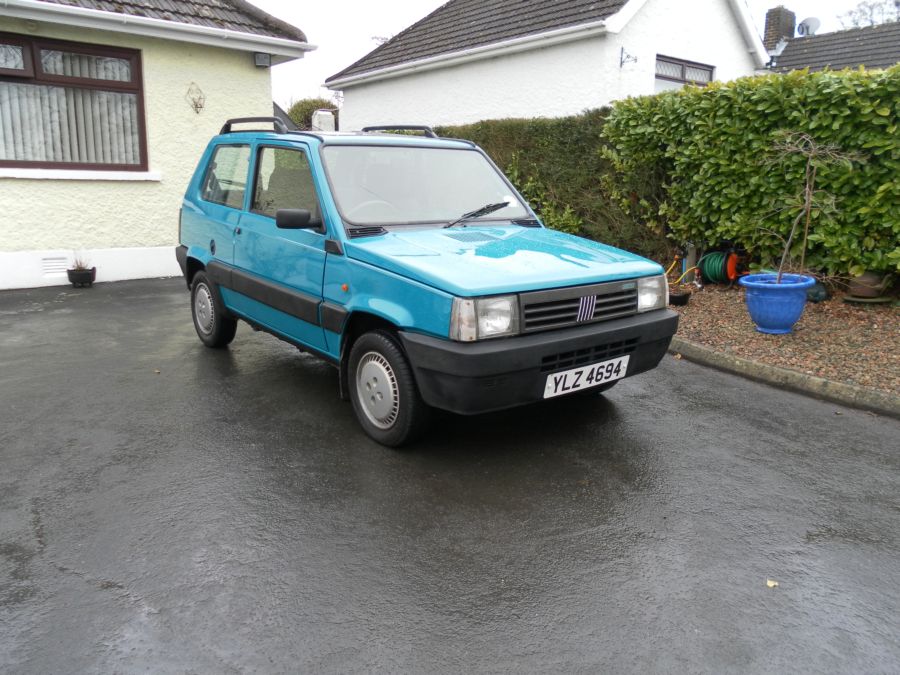
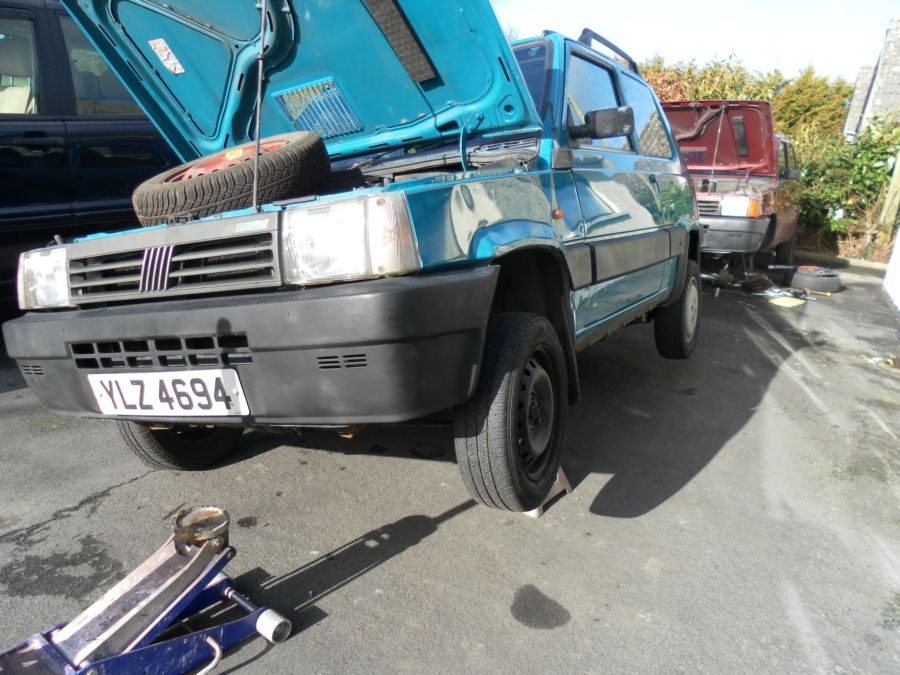
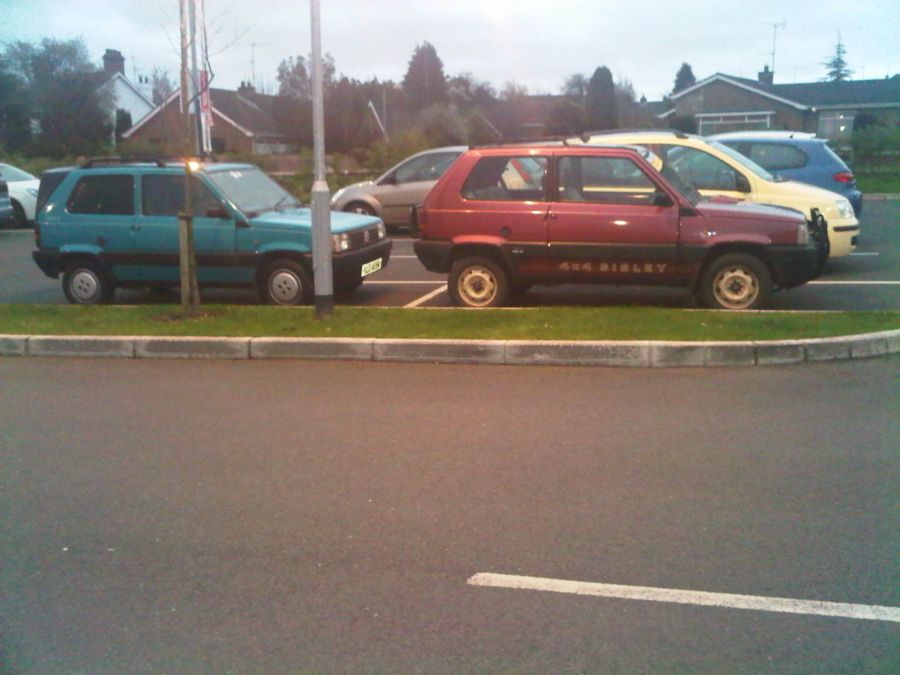
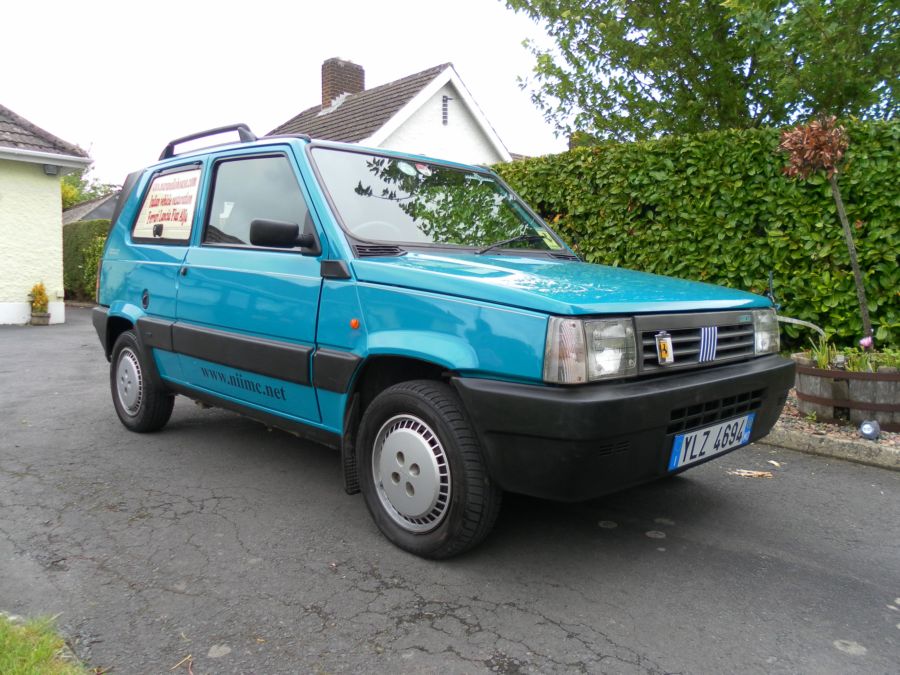
05/02. I bought this Panda on 01/02 as a non runner with intention of putting it back on the road and turning it into a Panda van. Today was the first I even seen it in daylight as I'd bought it at night in the pouring rain. My mate Steven who was up visiting from Killarney got roped in to helping me tow the car home.
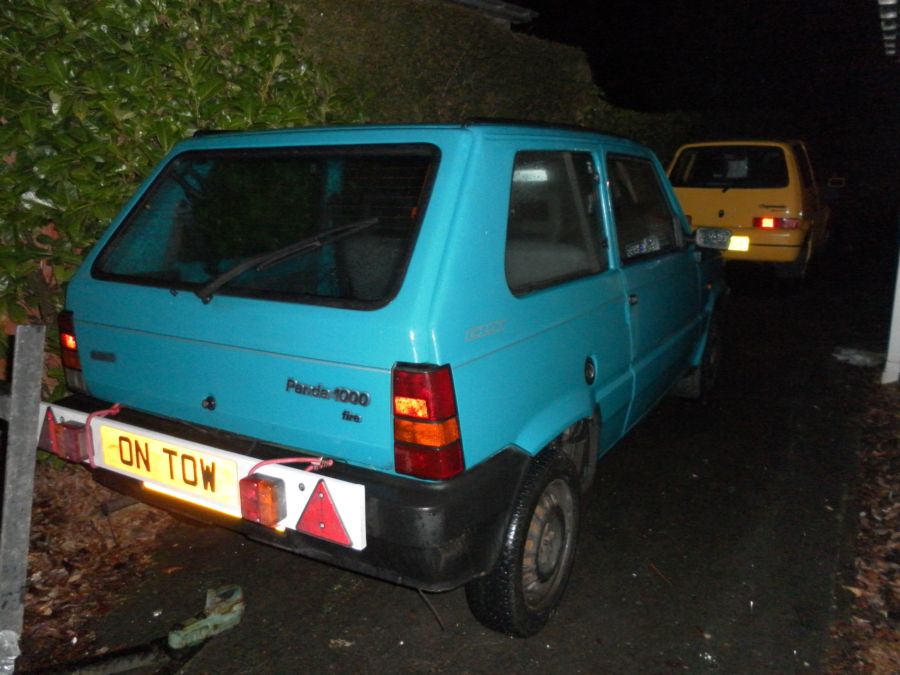
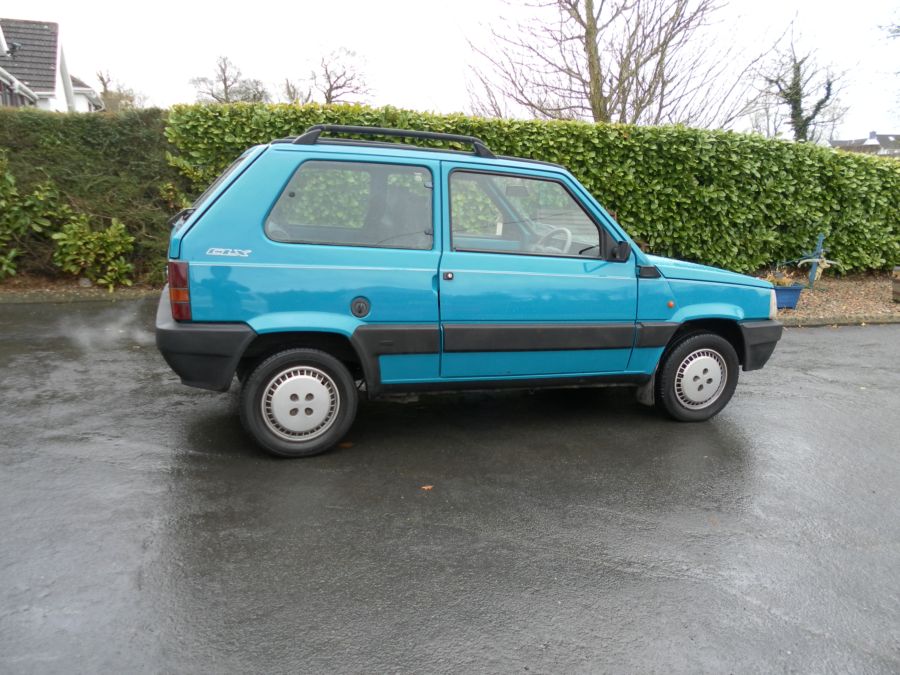
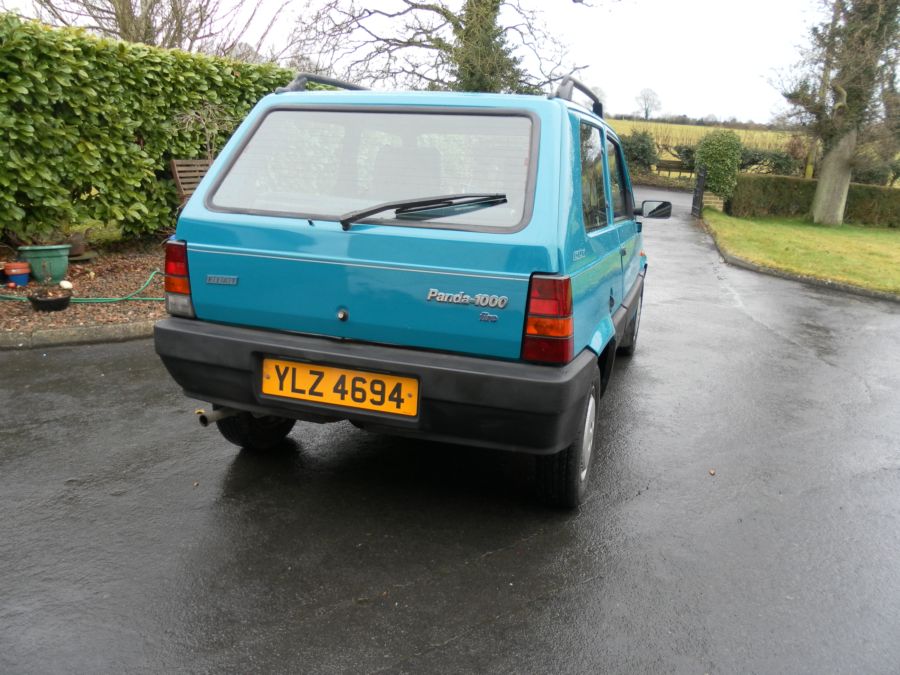
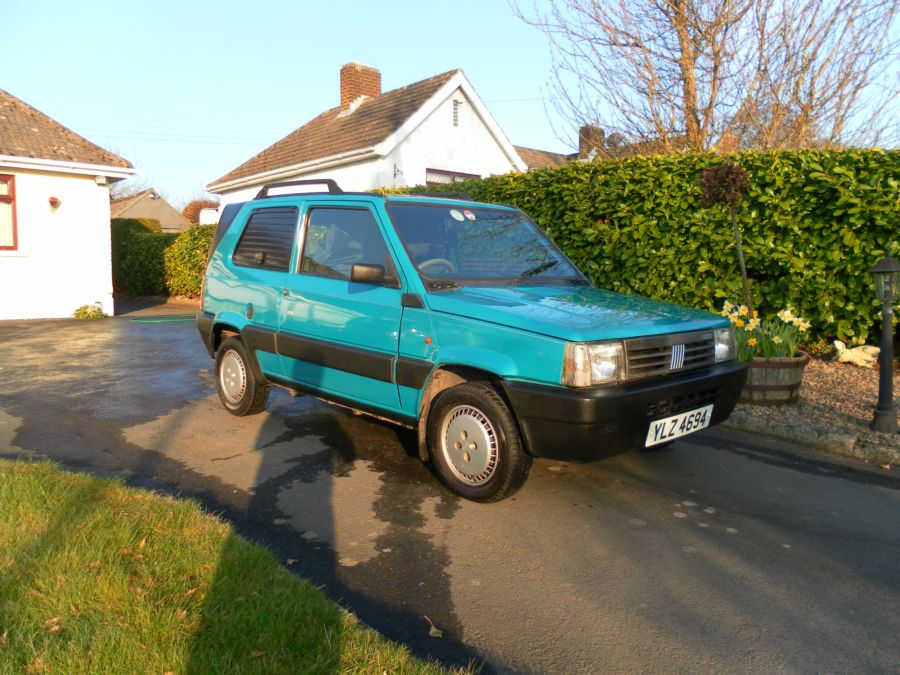
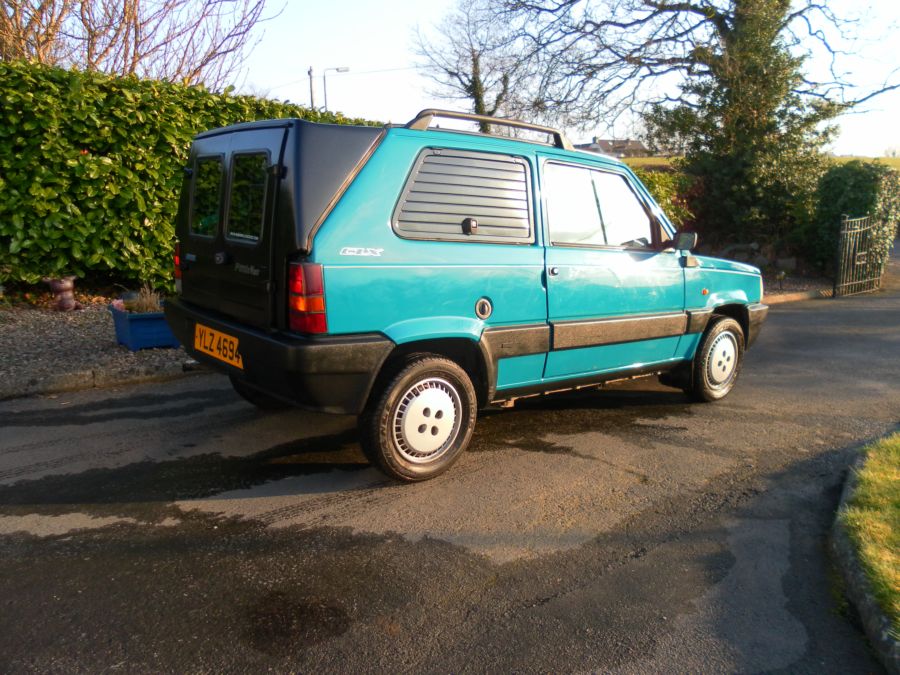
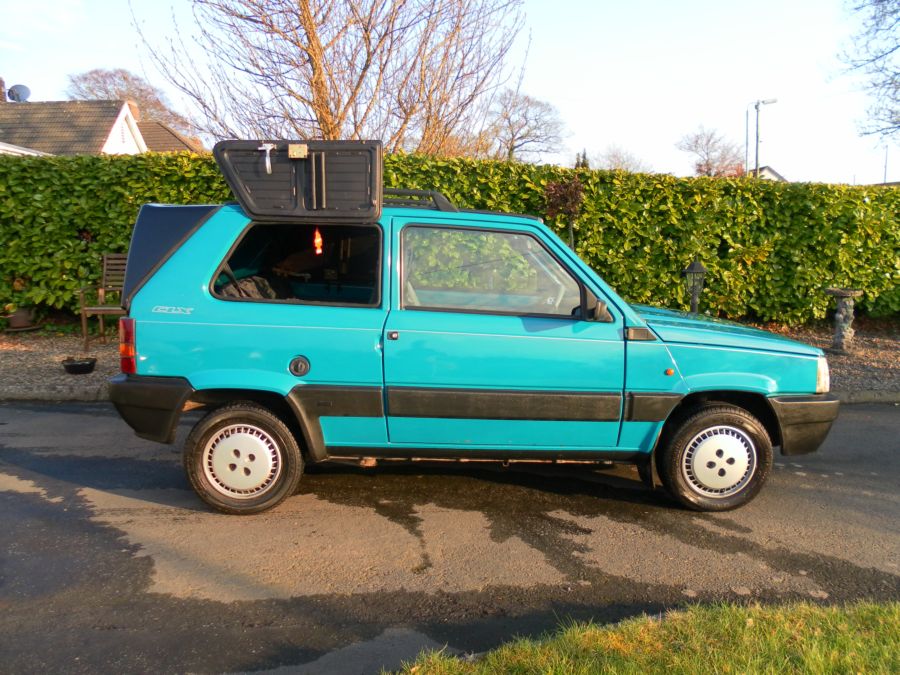
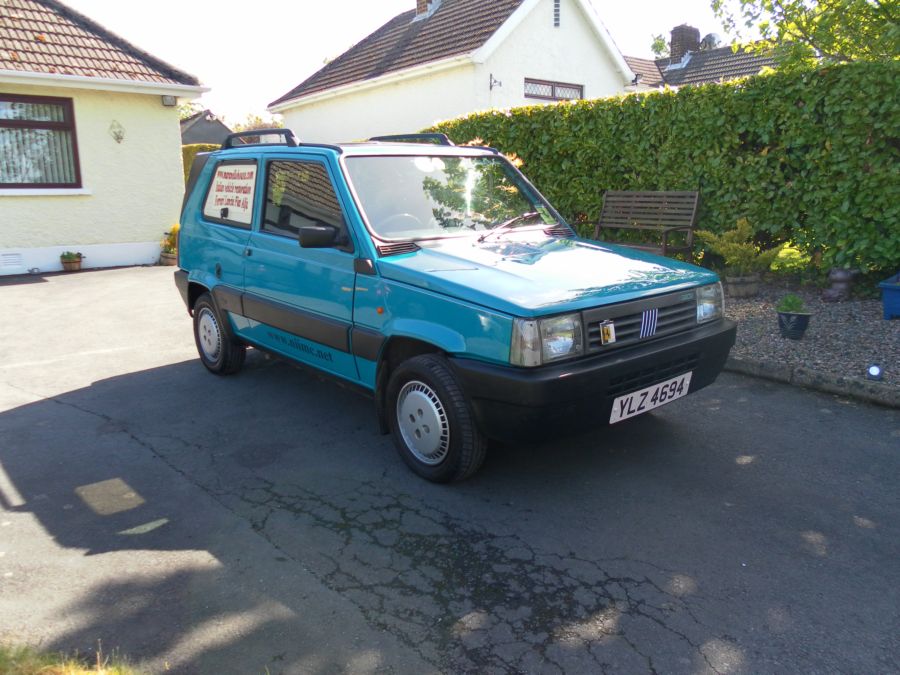
So the first thing I did was to see why the car wouldn't start. The owner said the fuel pump had packed so I swapped the one out of the French Panda only to discover that the fuel line in the engine was cut in 2 and the fuel was going straight to the ground. Fuel line fixed, pump in, turn the key and the car started first go. time for the usual first photo's to show how the car is before I start work.
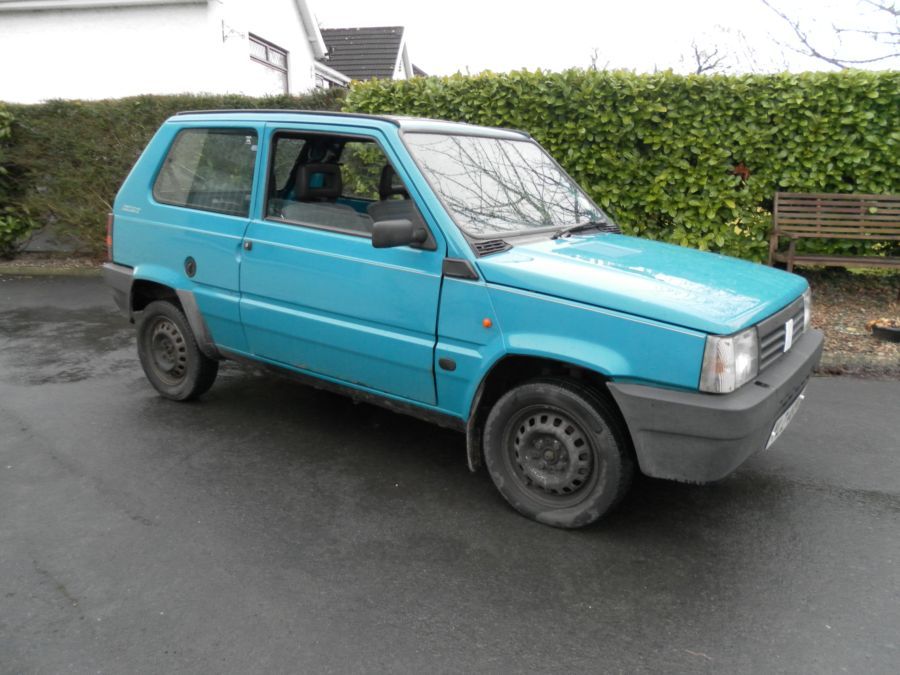
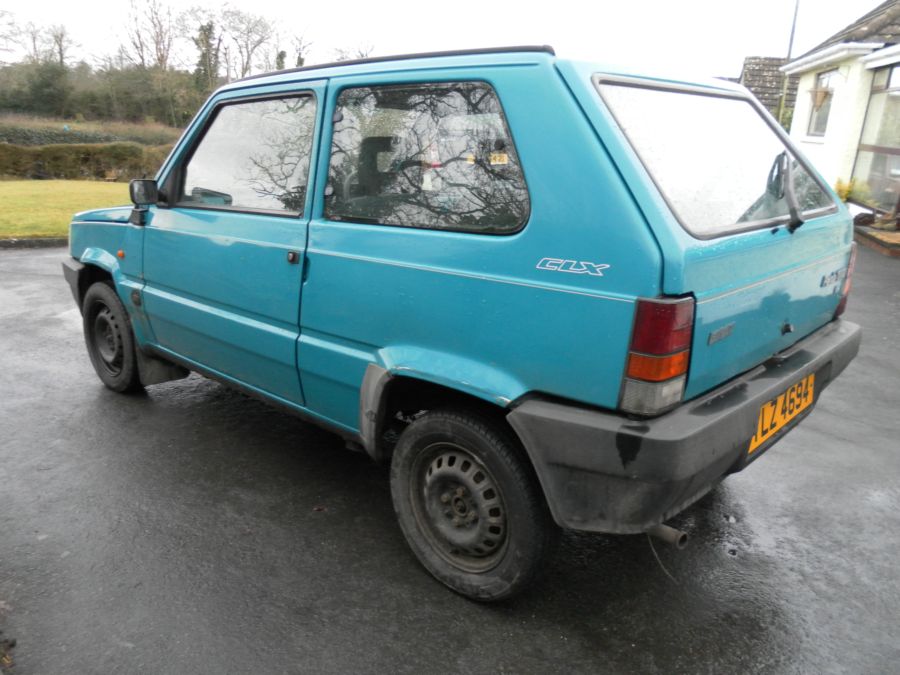
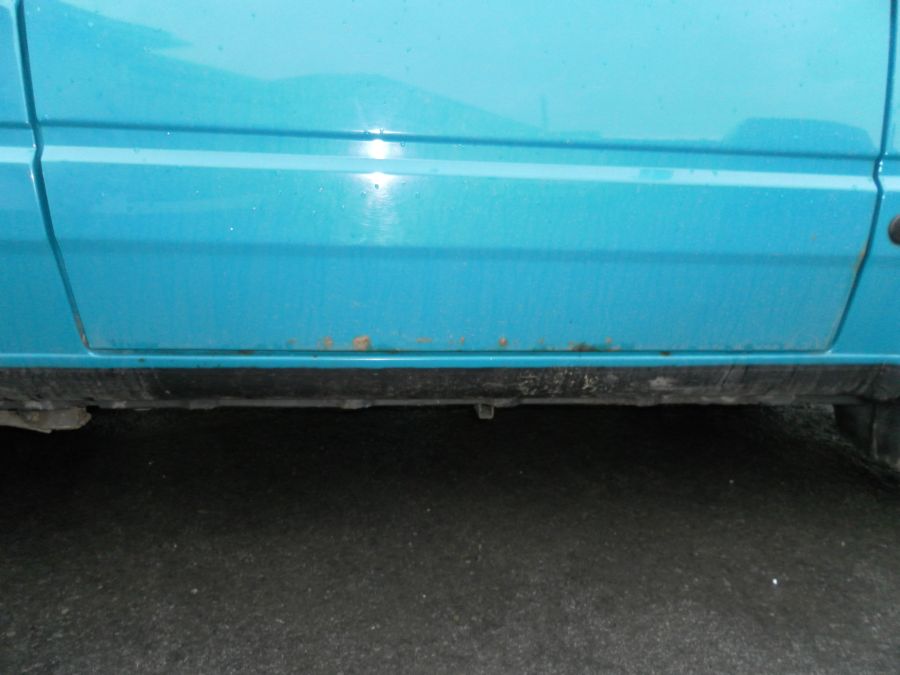
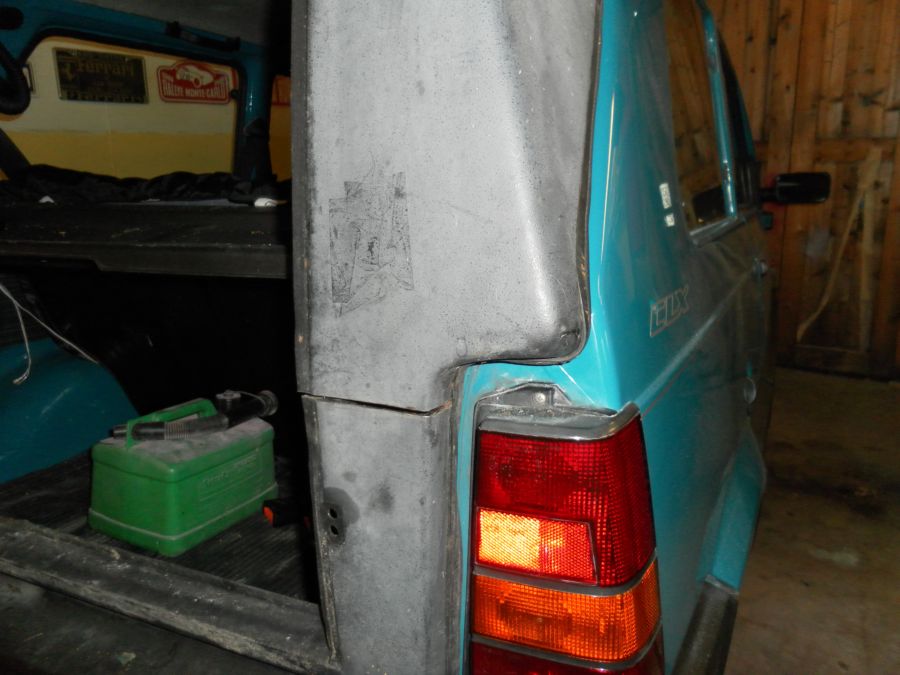
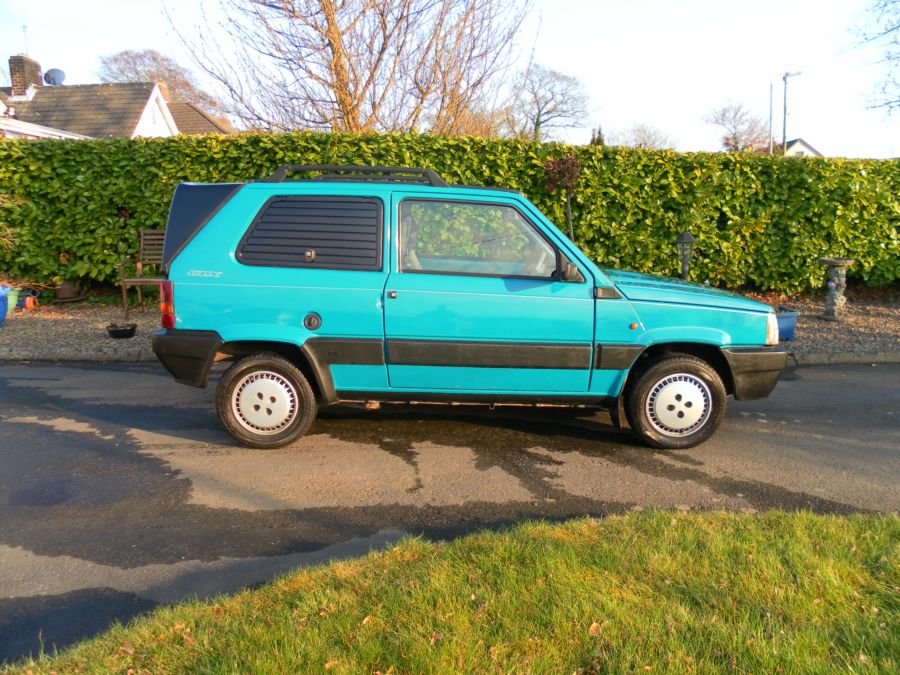
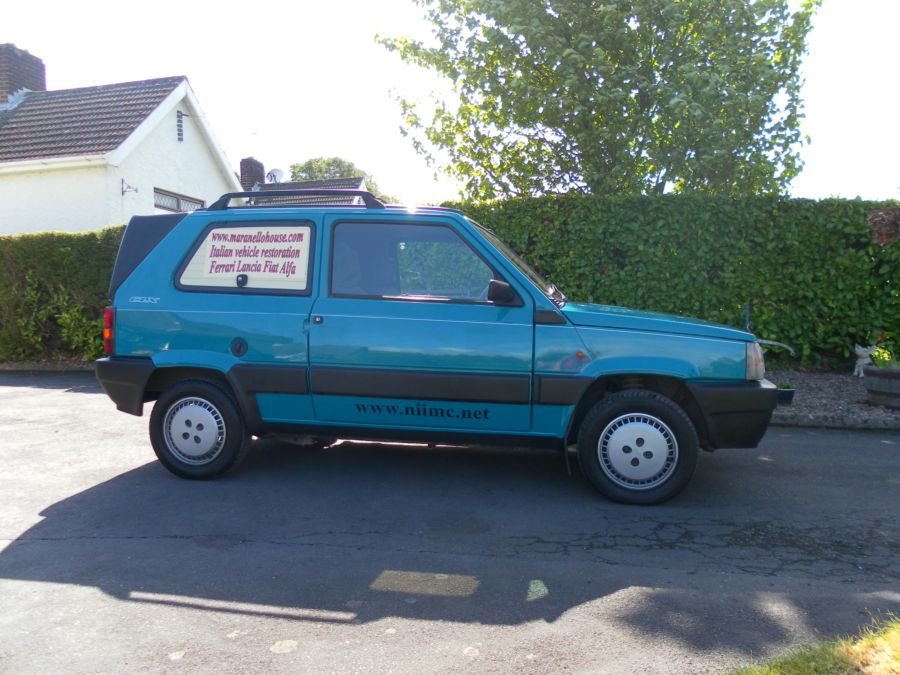
Overall the car is in pretty good shape. The drivers door is just starting to show signs of rust at the bottom but its early enough to stop before it gets worse.
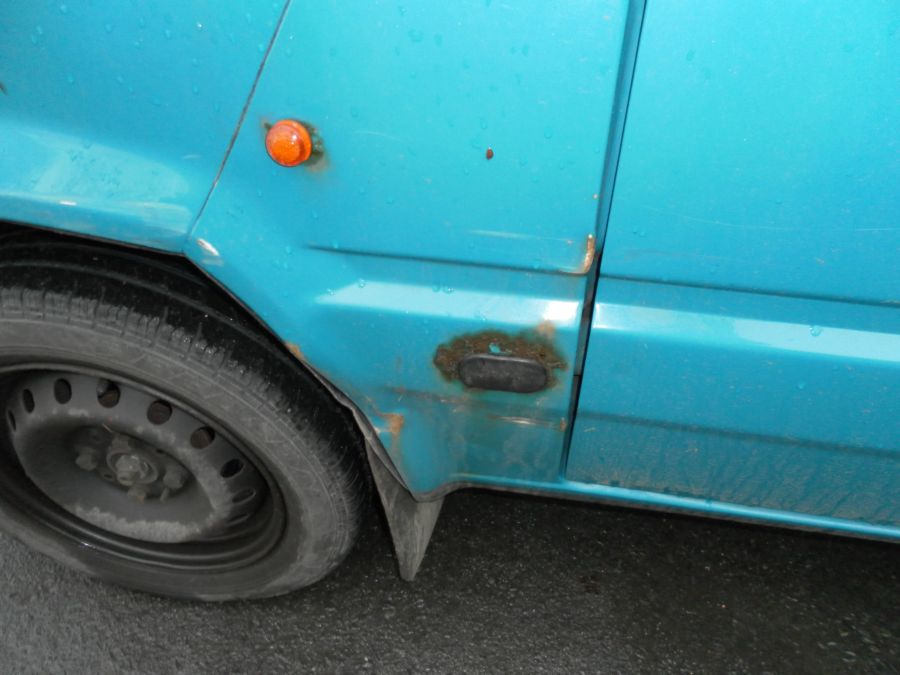
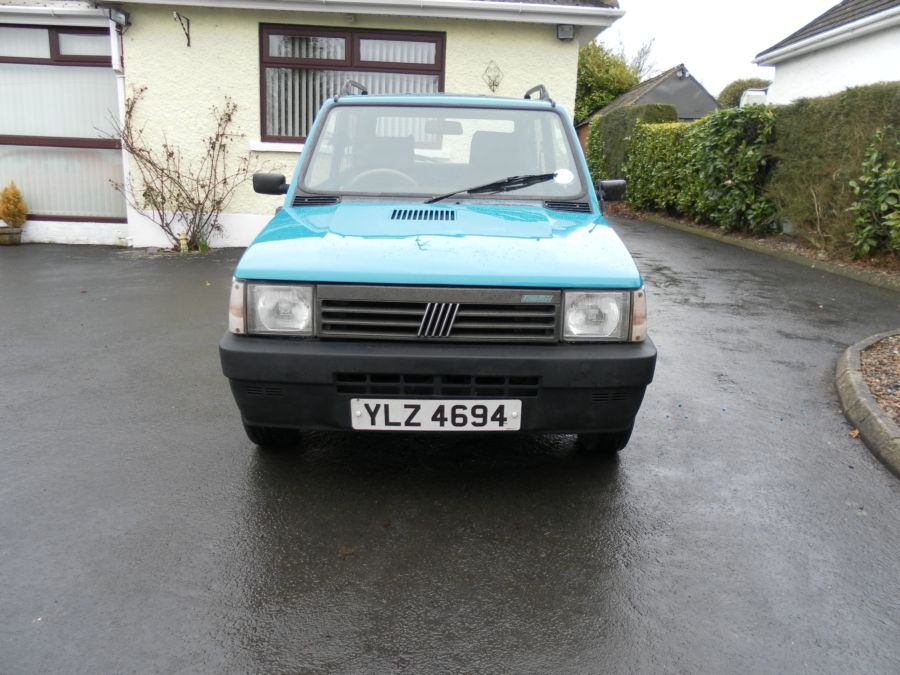
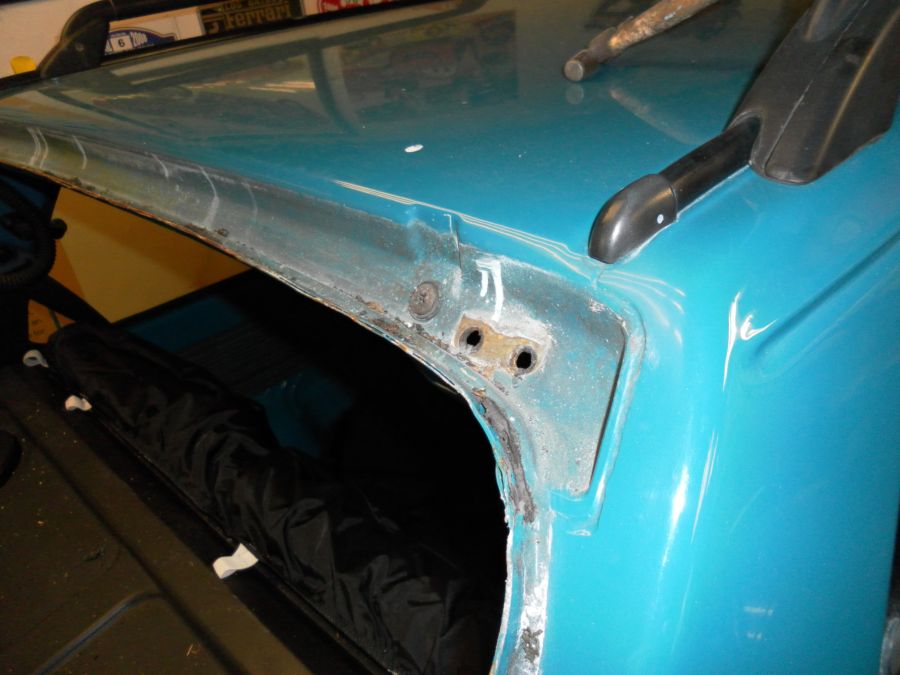
The passenger side front wing has had a knock at some point and the hole were you get to the door hinge needs looked at.
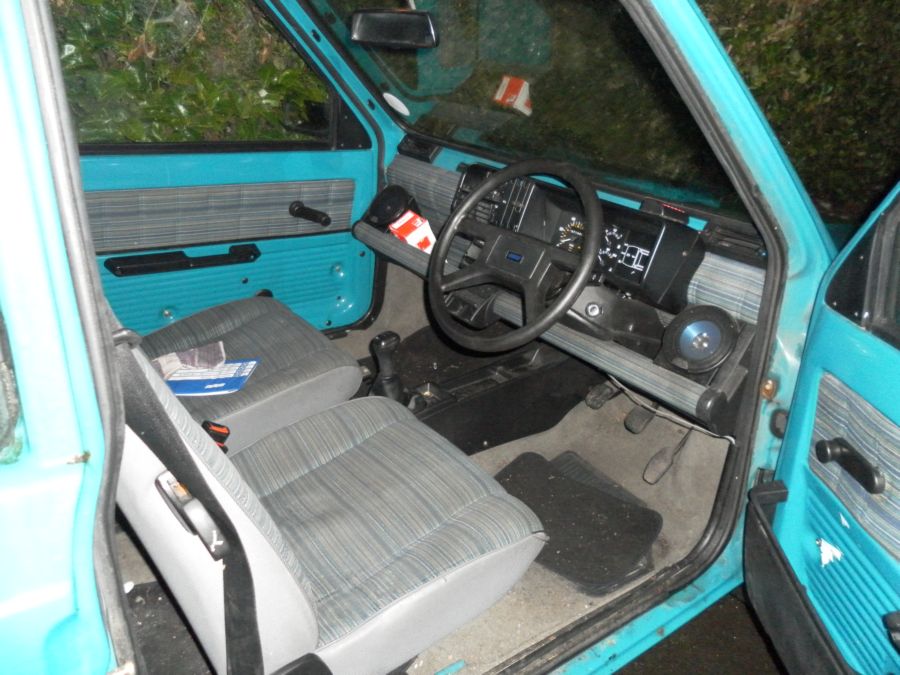
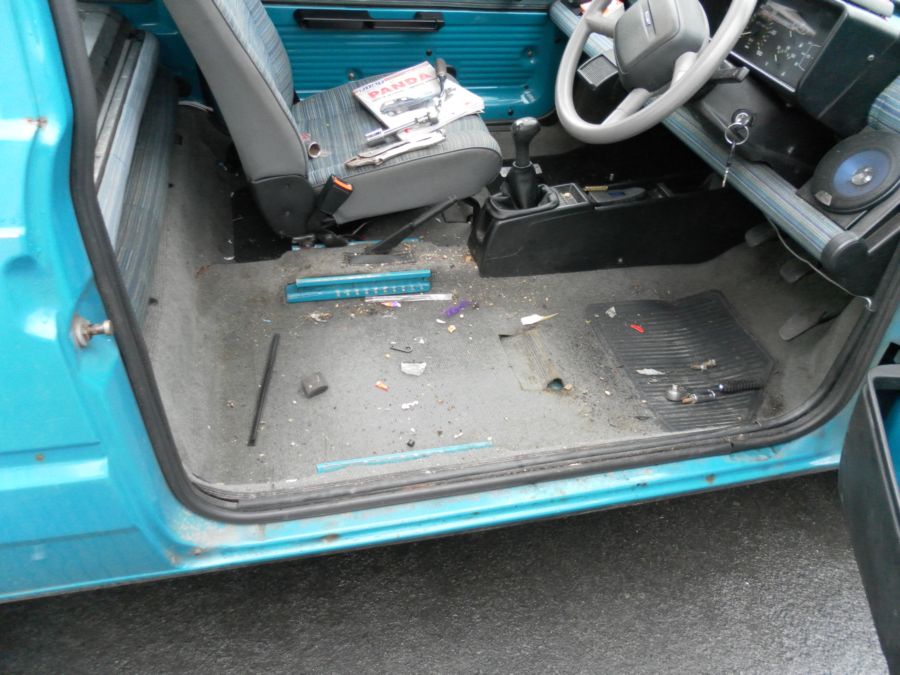
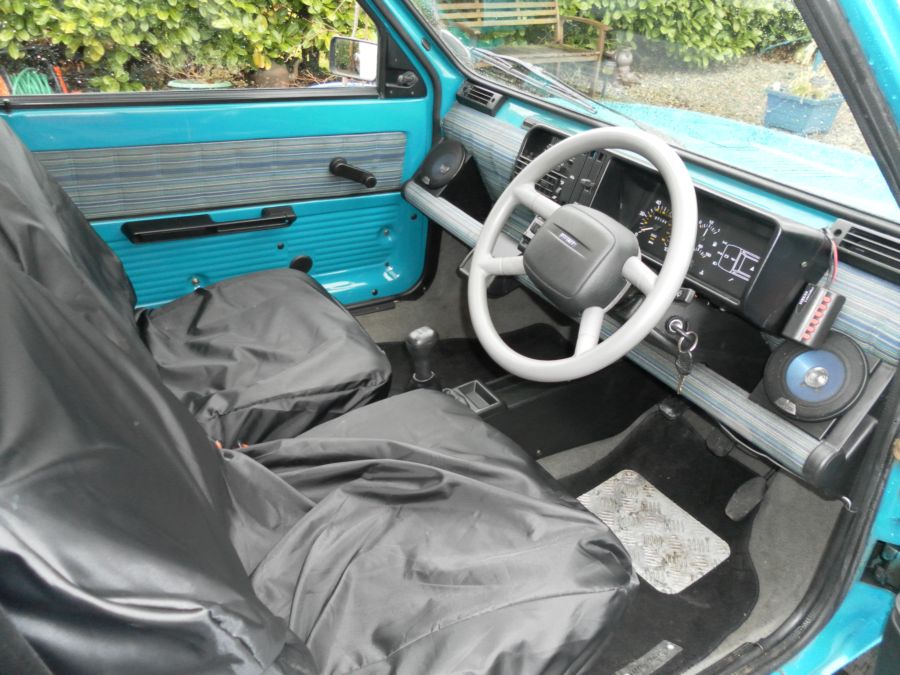
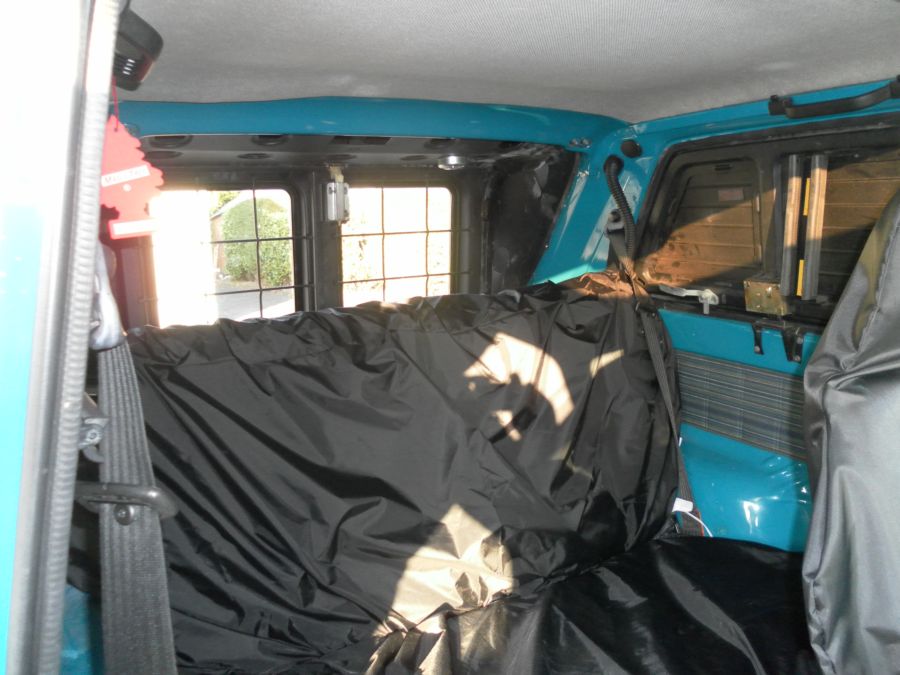
The interior is a bit worse for wear but everything works if a bit grubby.

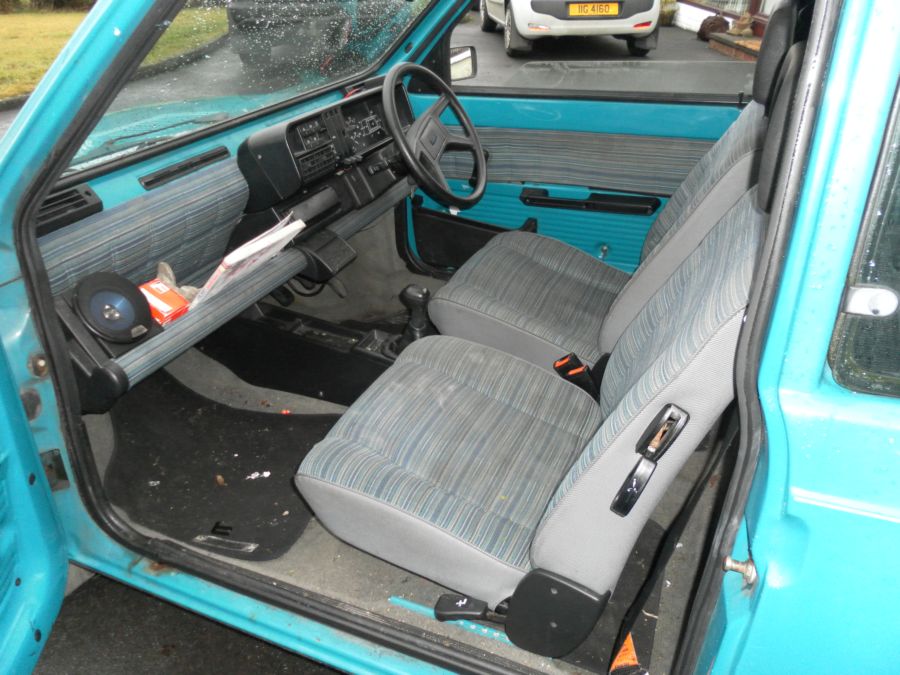
It even has a radio, and speakers.
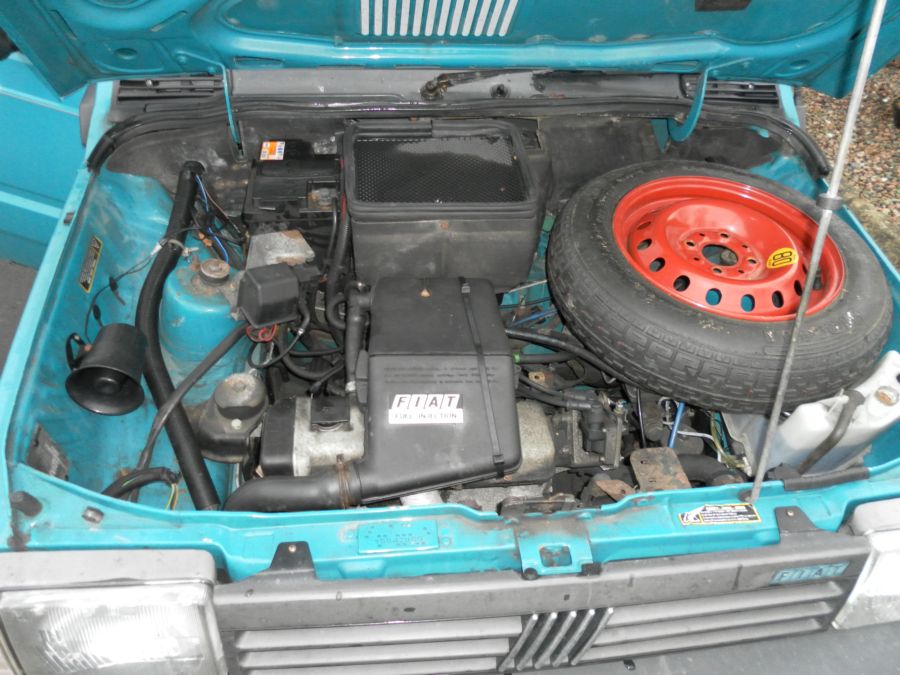
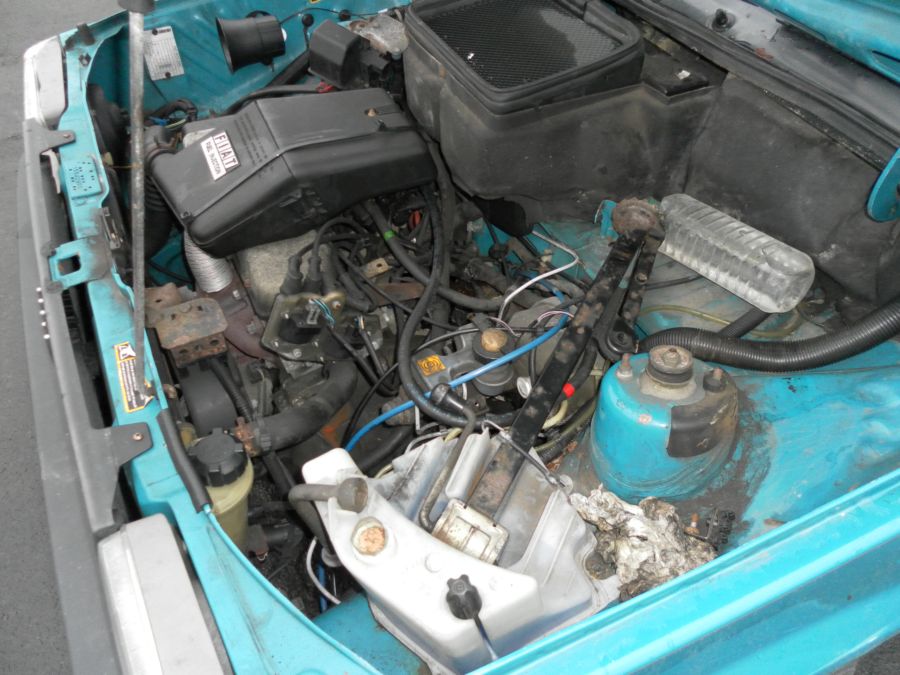
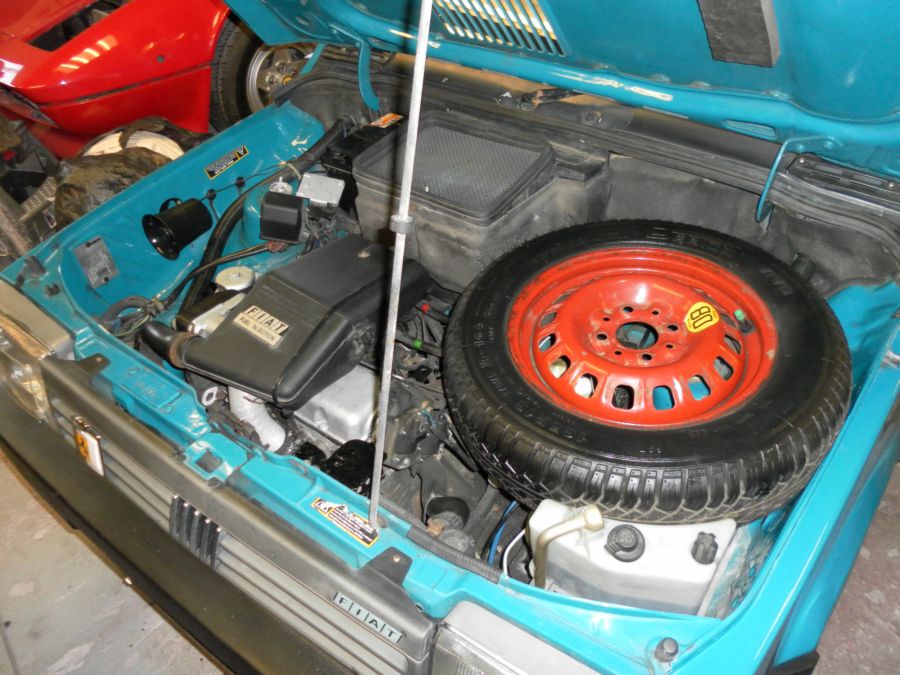
The engine seems to be fineand I don't see any oil leaks which is good but I see the airbox is held together with a cable tie. That will need sorted. And I have no idea what that spare wheel is from but its not a Panda.
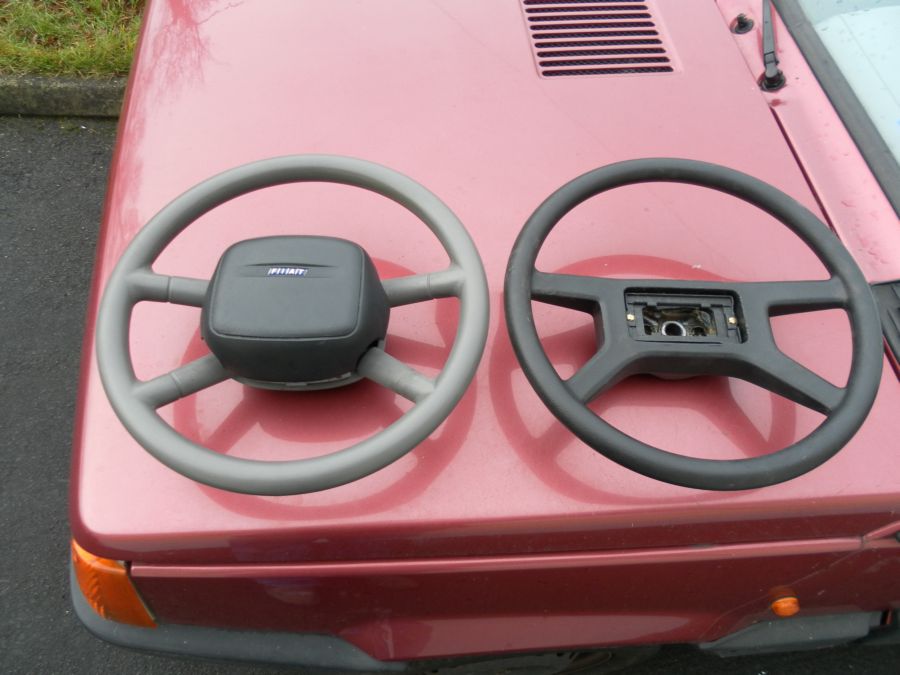
The interior of the Jolly is in better shape than the CLX's so I started with the steering wheels.
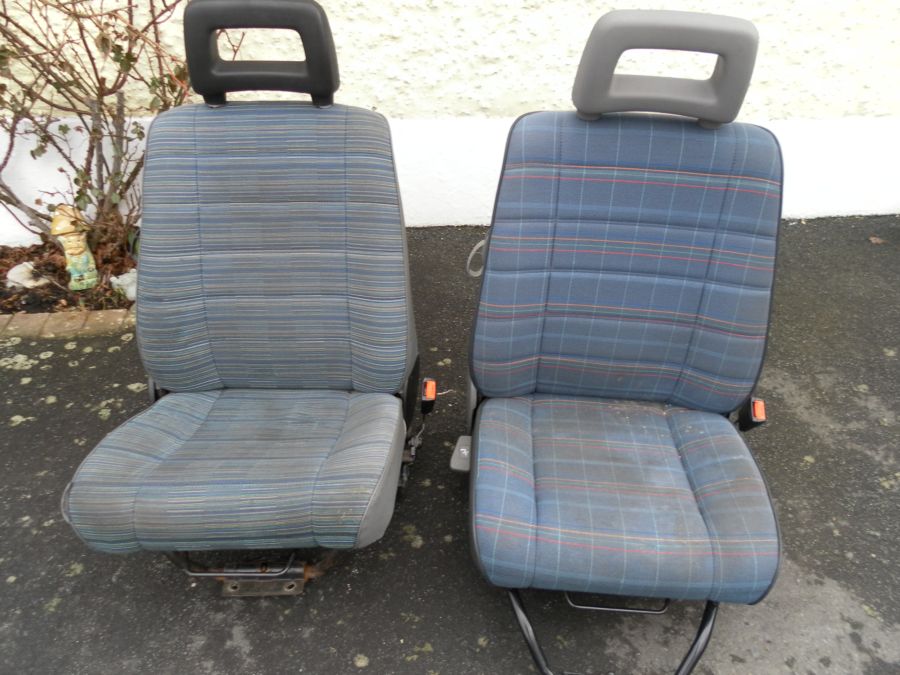
Next was the seats. I know they are equally dirty but the ones from the French car are more comfy and they will clean up.
When I got the seats out of the car I got the vacumn out, of all the cars I've owned I don't think I've ever seen one dirtier.
I changed the door mirrors to as the ones on the CLX aren't adjustable from the inside. With all that out of the way I took a look at the drivers window winderas it was only going up 3/4 way then clicking. turned out the mechanism was broke and need replaced. The French panda has electric windows which I'm saving for the Sisley so I had to take the mechanism out of the Sisley.
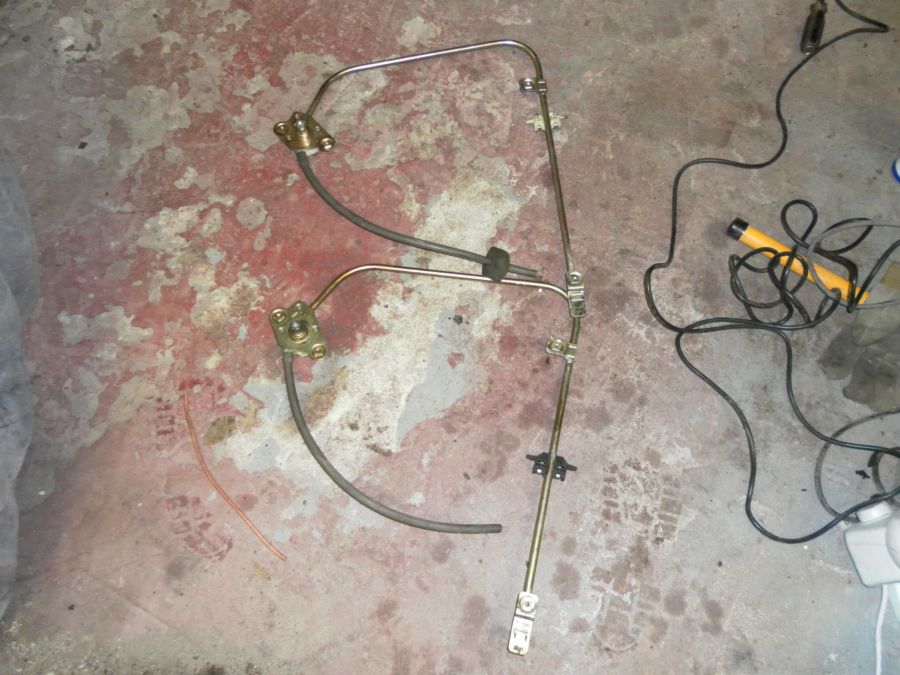
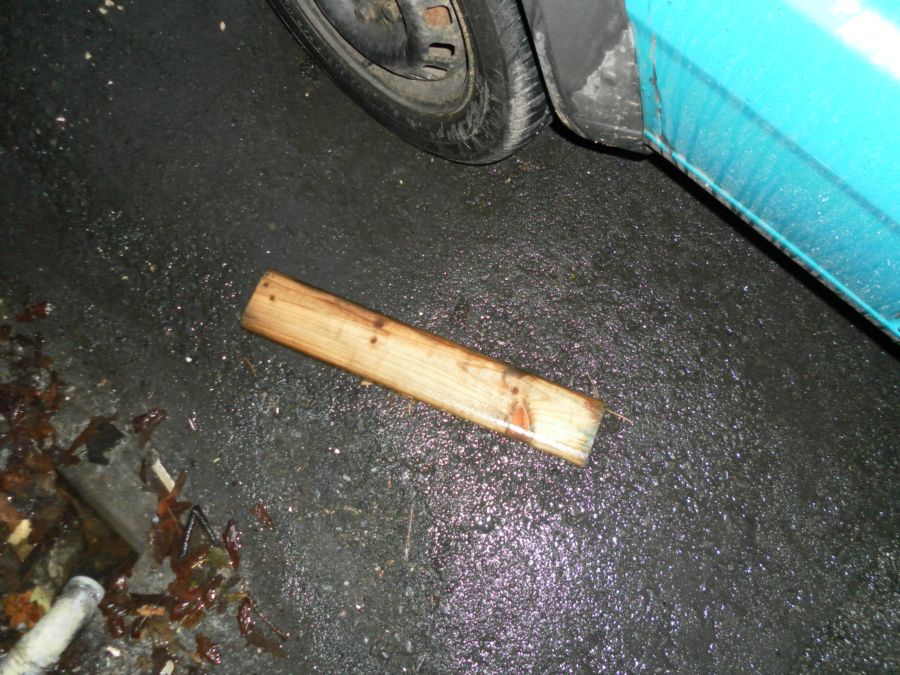
While I was trying to sort the window it started to rain. The window wouldn't go all the way down to allow me to get the Mechanism lined up and it wasn't until I was properly soaked that I figured out why. A big lump of wood was inside the door which must have been there to hold the window closed.  Next step is to get the car into the garage and see how well the paint comes up.
12/02. I got the car into the garage today and started to G3 polish the paint to see how it would come up. I didn't work at it to long as I've been ill for what seems ages now and am just to run down to keep at it. The paint is actually coming up very well which should tidy the car up a bit. The bit on the bottom left of the photo is the bit of the roof that I haven't done.

Also one of 2 parcels arrived yesterday from my friend Rele in Serbia containing Panda Van doors and side panels. The rest should arrive next week at some point. I'm really looking forward now to getting the van theme started.
19/02. New oil filte, air filter and plugs to go in today to start with.
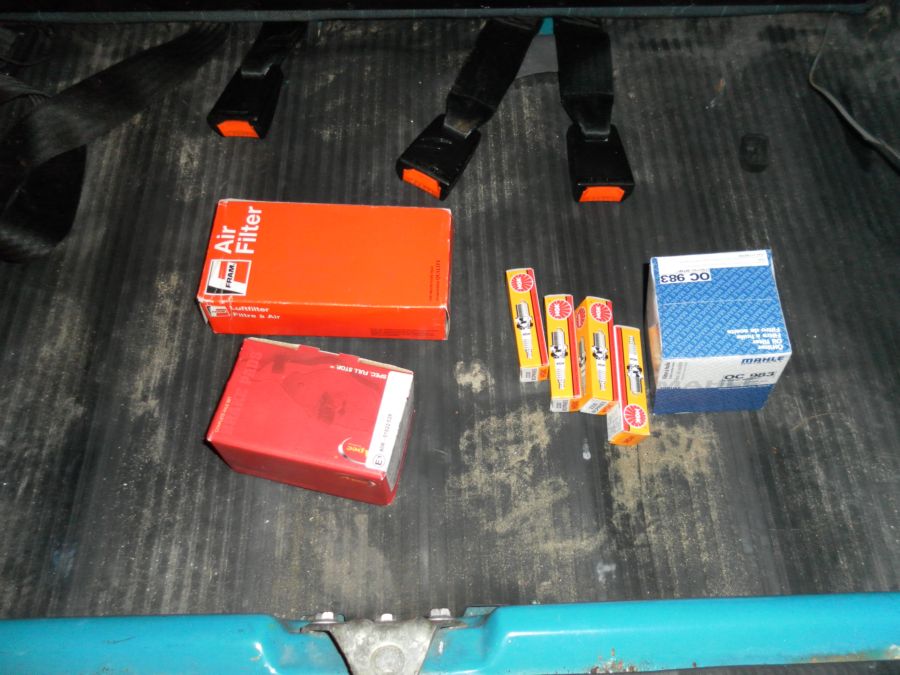
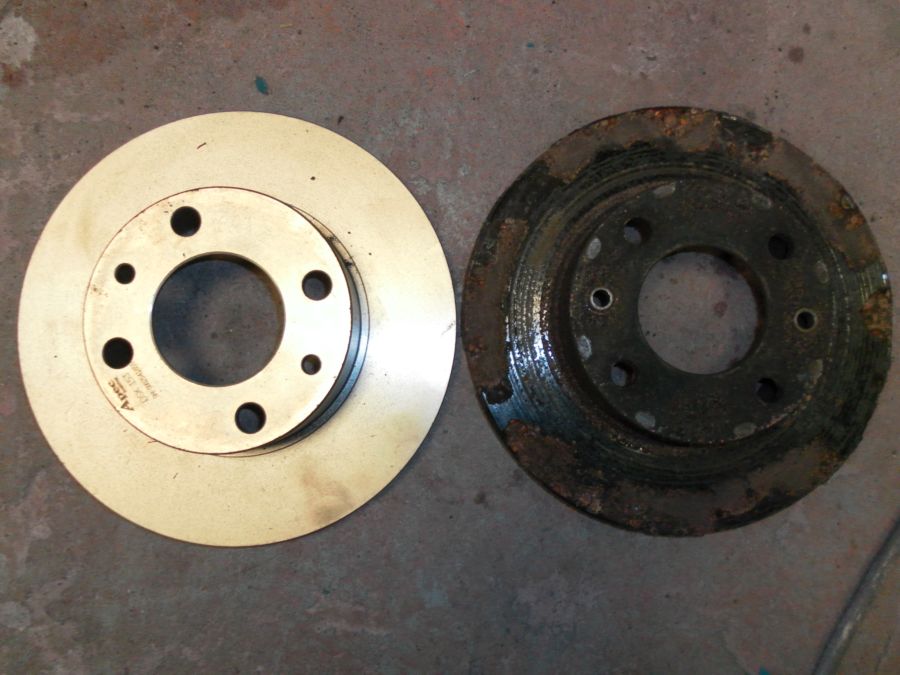
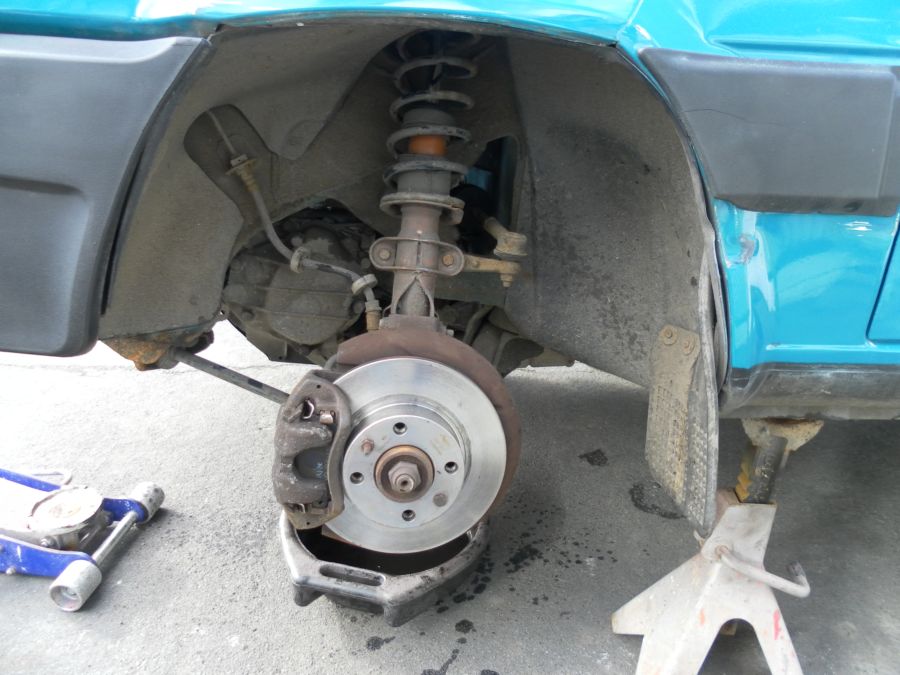
And as I was setting about changing the oil the new brake discs arrived. I didn't do a photo set on how to change them because you'll get that on Juppys restoration page. However as you can see the discs were in a bad state so badly needed done. I fitted new pads to even though the pads on the car had very little wear.
I'm using the side mouldings and the roof bars from the French Panda so the next was spent taking them off the car and working out how I'm going to stick them to the car as it has no holes in the doors and I'm not going to start drilling holes in good doors.
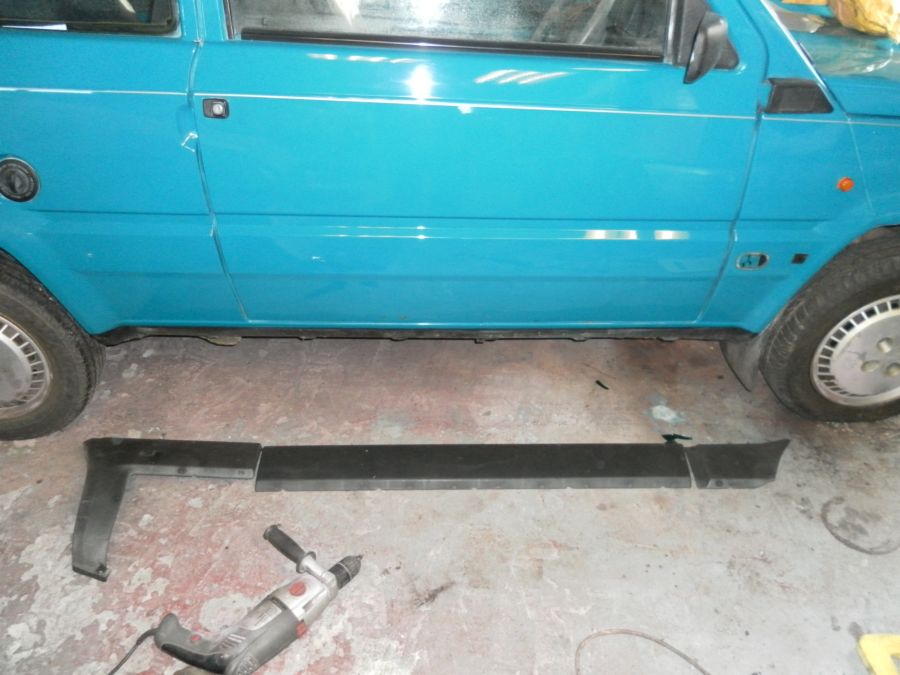
I decided to use a strong rubberised adhesive that will move slightly, this should allow the mouldings a bit of flexibility and cushioning when the doors are closed etc. It should work!
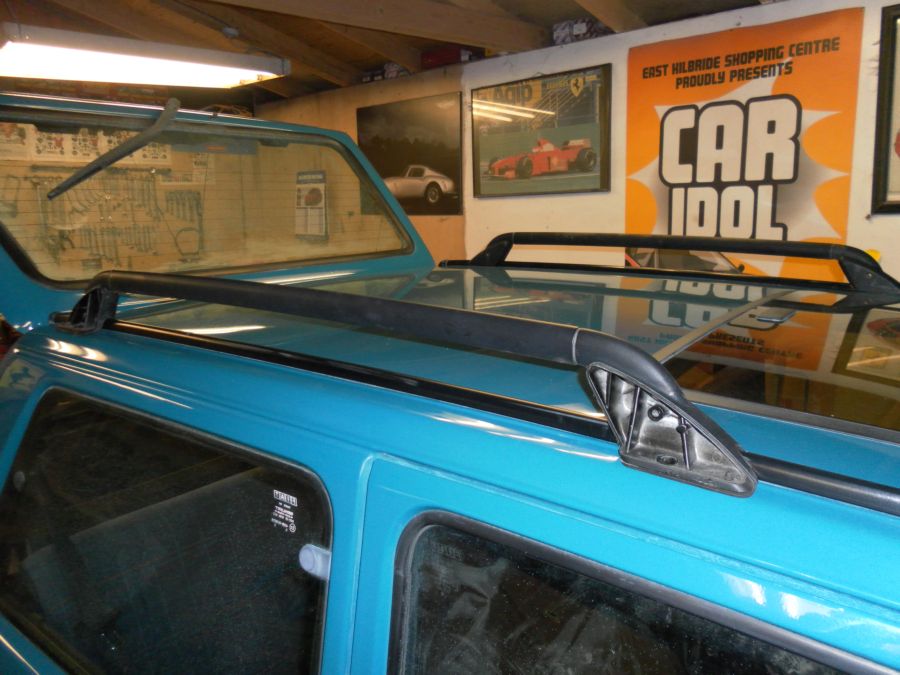
20/02. Roof bars to be fitted this morning. I'm using the ones from the French Panda so everythings there that I need. First job is to set the bars on the roof and measure them for the right position.
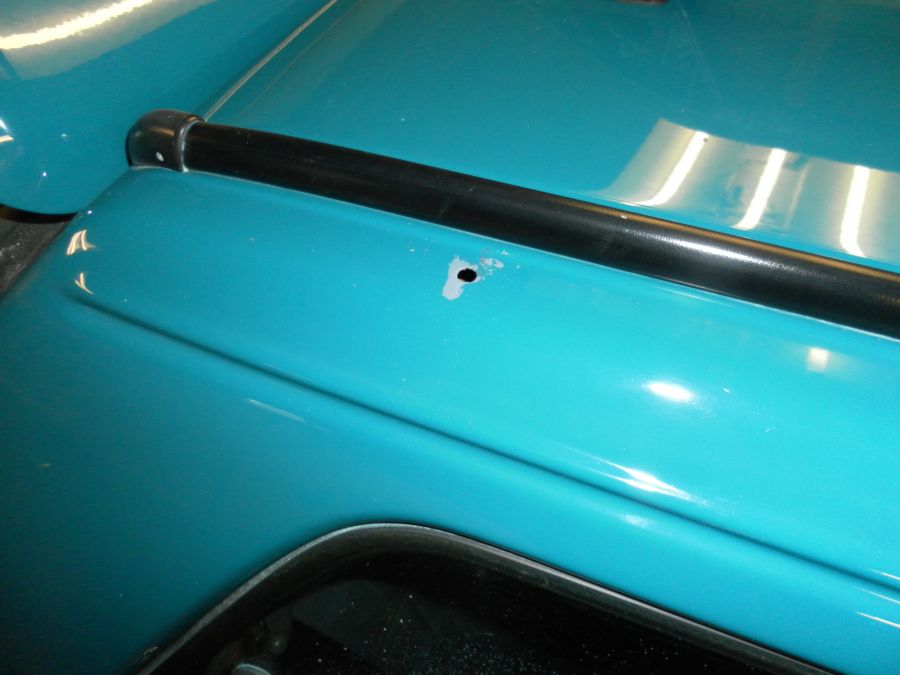
Once done 4 holes have to be drilled. Once I drilled them I treated them to a little rust earter to be sure it doesn't get hold.
The brackets have to be fitted through holes on the inside of the roof rail. Very handy little brackets they are to, they have an arm to hold and guide to the right place.
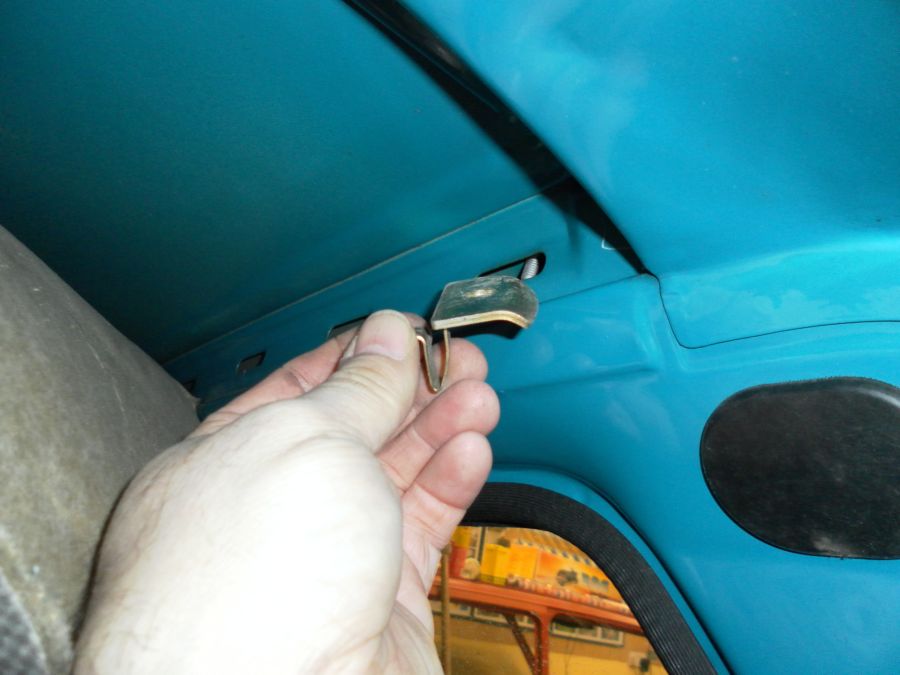
And in place ready to line up with the rail.

23/02. Bit of a rush on last night and early this morning as the Merc had to be left in to have work done on it and I don't know when I'll get it back so I now need the Panda on the road. Thankfully all I had left to do was fit a new wiper motor assembly, (done last night) fit the wheel trims, re-attach the front and rear bumpers on one side and put some petrol in. The car is definately turning out a lot better than I thought it would. So stage 1 of turning it into a van is now complete. Once the rest of the parts arrive that my friend Rele in Surbia sourced for me the final stage will begin.
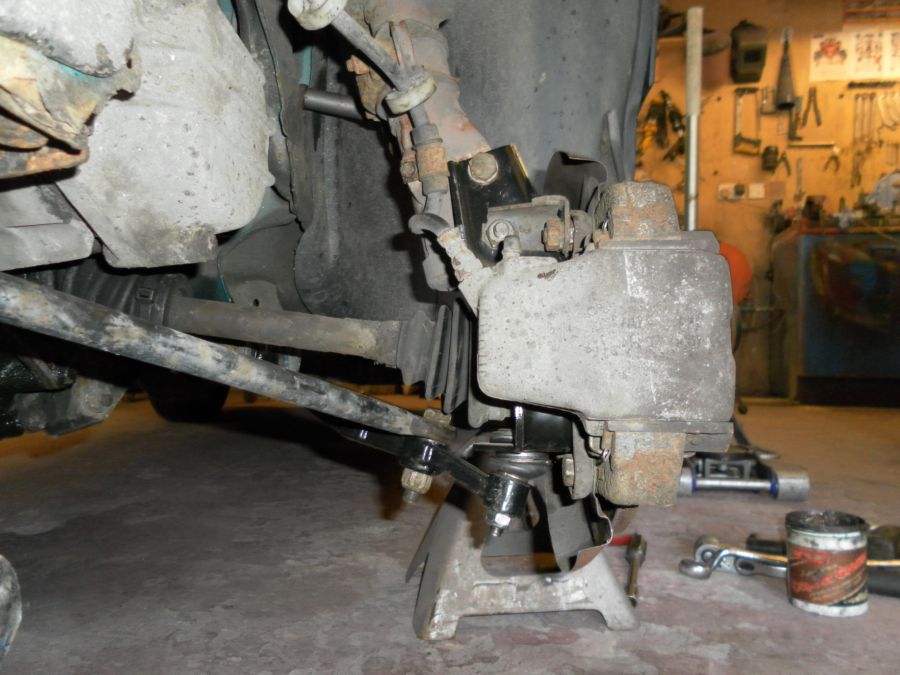
26/02. Since getting the car on the road it has had a pretty bad rumbling noise and a bad vibration coming from the pasenger side front. I suspect its a wheel bearing and UV joint both going. So the plan for today was to take the complete pasenger side suspension out of the French car and fit it to the blue one. It would be much faster and easier to do. So I checked that both were the same to be sure.
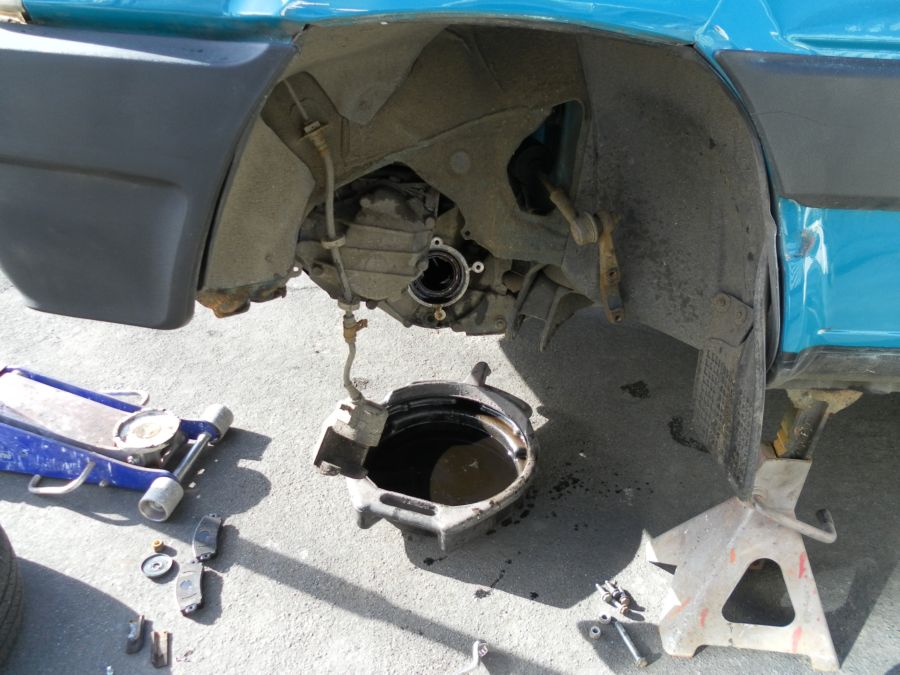
Then it was a straight forward process. take off the brake caliper, undo the guide bar, take out the lower wishbone, undo the 2 13mm bolts that clamp the steering bar and put it out of the way (by doing that you don't need to remove the track rod ends), undo the 4 13mm bolts to release the drive shaft and then pull it out making sure the oil goes into a container, and lastly undo the 2 13mm nuts holding in the damper from inside the engine bay. Hey presto and it all comes out as one unit.
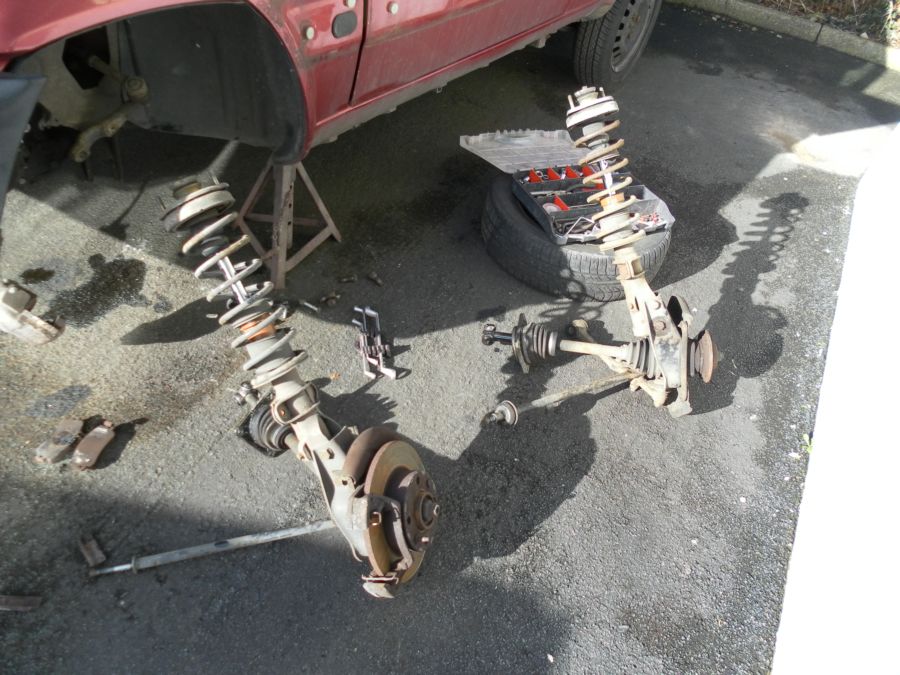
Once out as one piece there's not much left.
And in just over an hour I had the swap done on both cars and back on their wheels. Quick test drive and no more noise. The cars is really running sweet now.
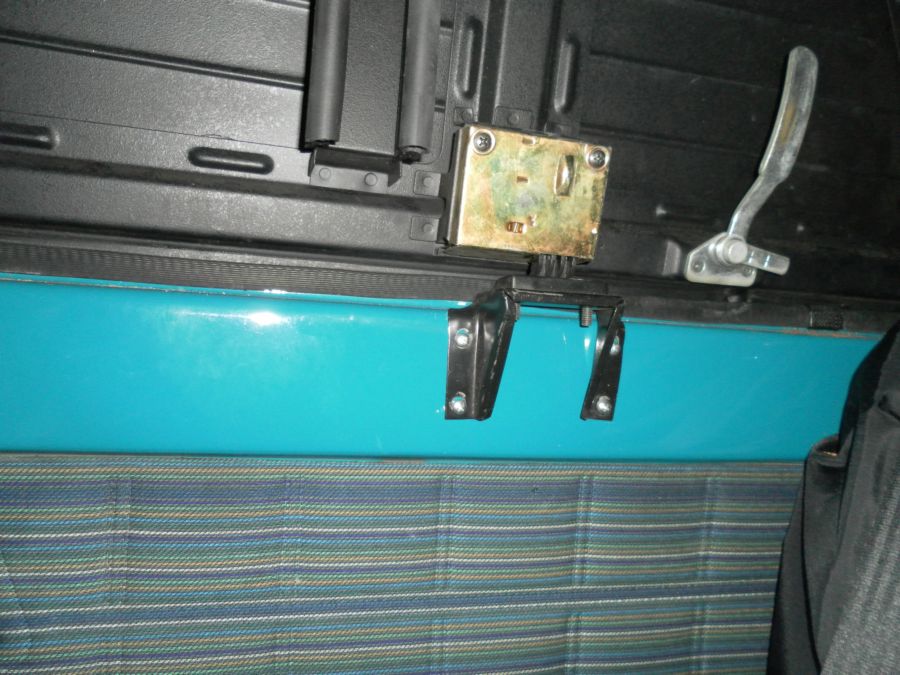
27/02. I had a little time this morning so decided to check out the doors of the van section in case they need anything. First thing that struck me was there is no key for the lock.
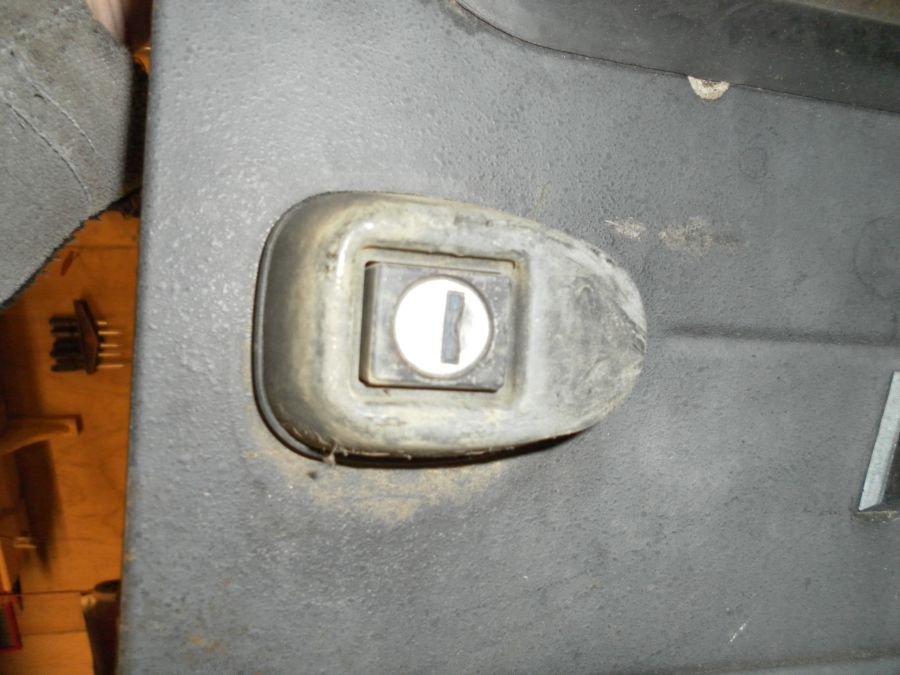
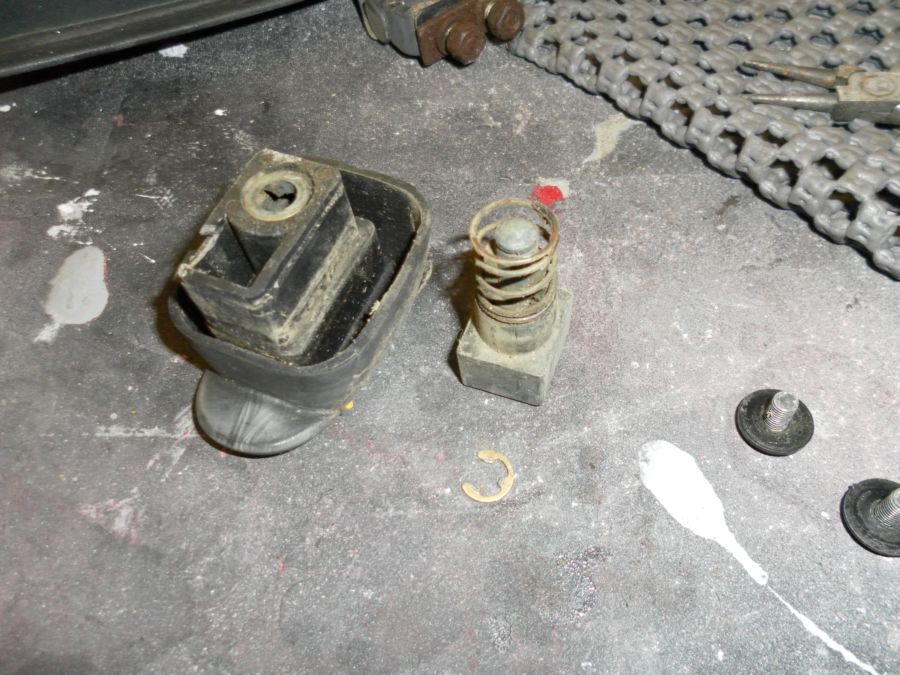
The barrel looks to be the same as whats on the boot of the Panda so I'm wondering if I can swap the barrels. I took the lock out and the locking mechanism so I can put some grease round it to make sure its free in the future.

Then I started taking the lock apart but it started raining very heavily so I wasn't for seeing if the barrels match. I'll check that one later.
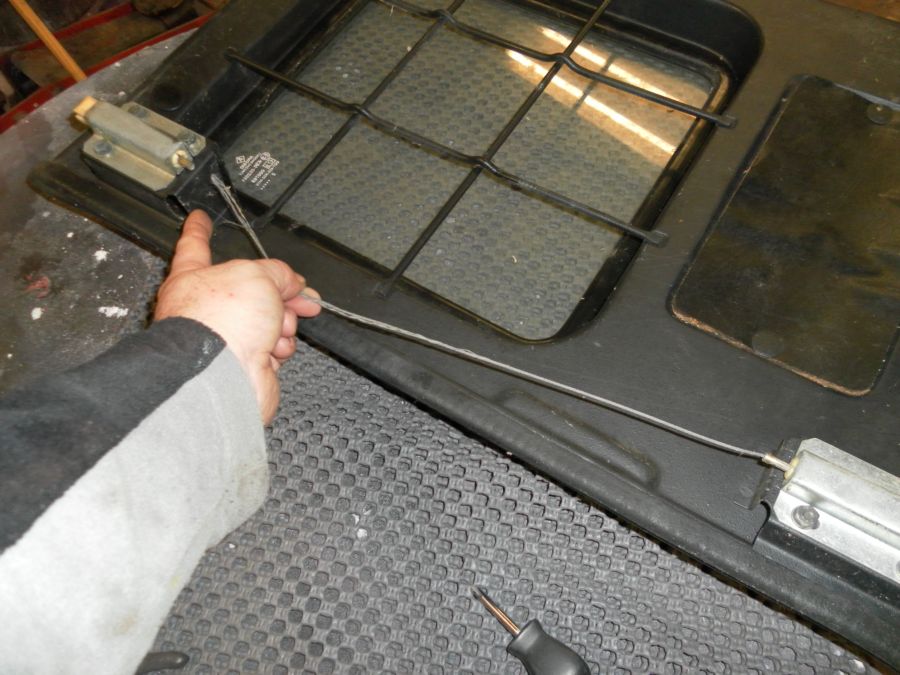
The other door pulls open using just a wire to release the 2 locks. However the wire has broken so I'll have to have a think about how to replace it because it seems to have been crimped into the ends of each lock.
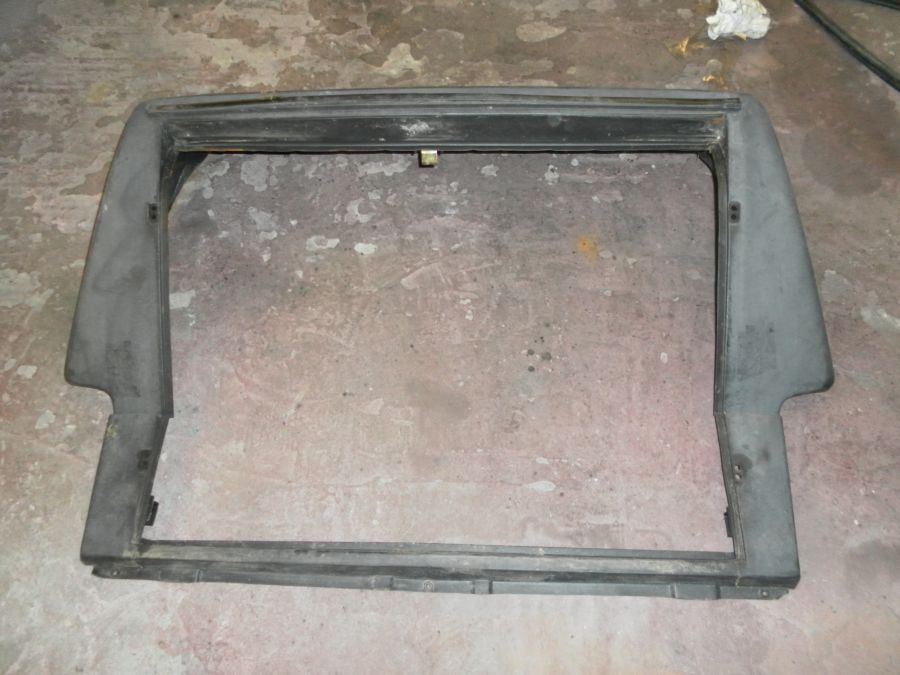
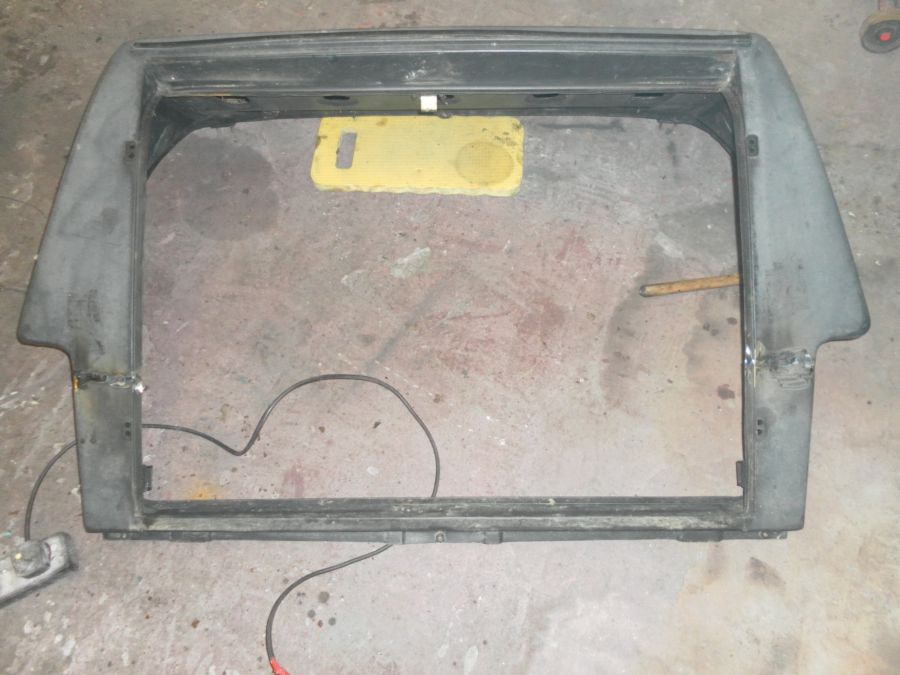
03/03. The final piece of the van parts arrived this morning so big thank you to Rele from Serbia for sending me everything right down to the last nut and bolt. Without him sorting everything I wouldn't be ready to make a Panda van. As you can see it came in 2 bits. Relel had to cut it in 2 because the post wouldn't take it as one piece saying it was to big. Its made of metal so no problem welding it back together.
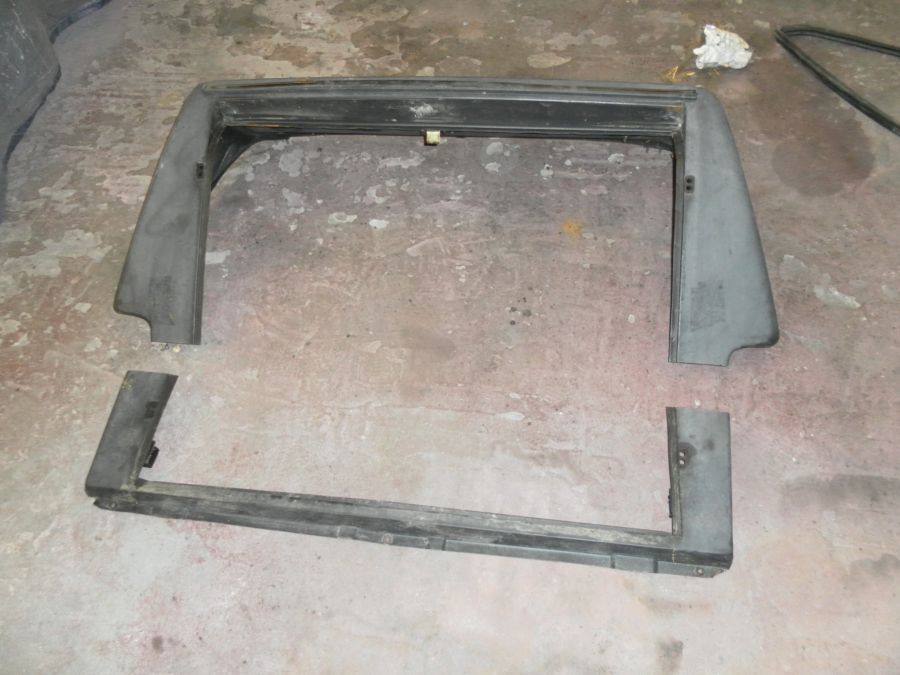
It should sort of be like this.
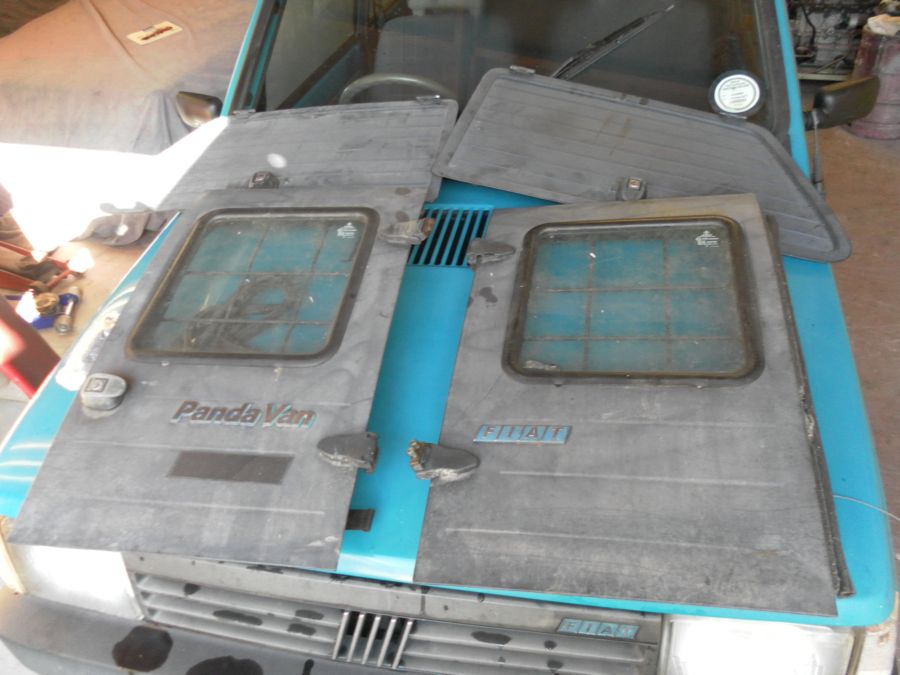
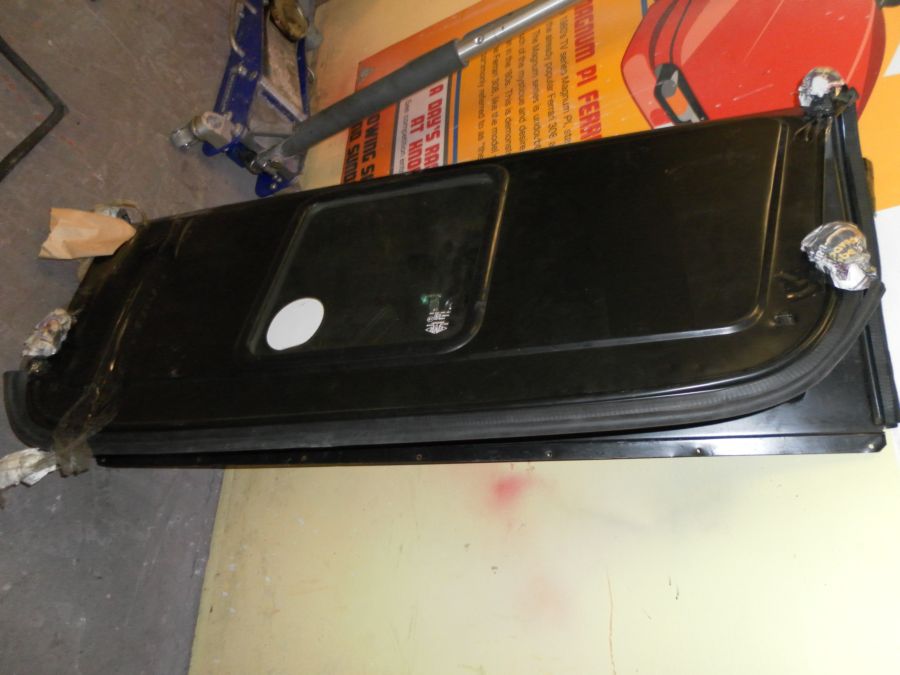
05/03. Haven't got a lot of time today as I want to get the Alfa ready for the mot but I do want to trial fit everything to see if I need to modify anything. removing the tailgate was the first job. It is only hled on with 4 10mm nuts and the piston to hold the gate up so 10 mins had it off.
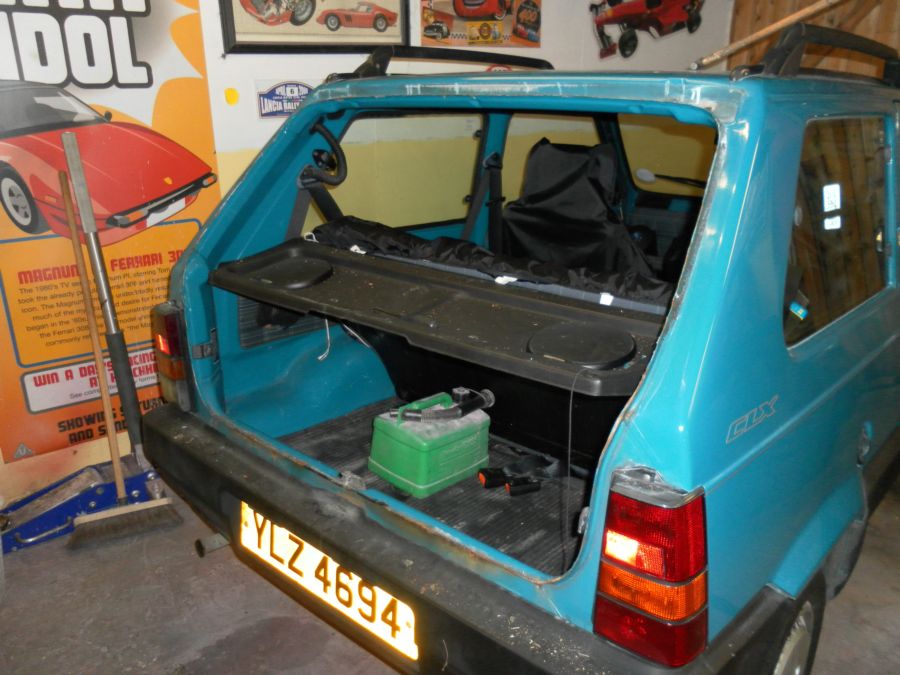
The van rear top has 4 welded bolts that go through the same holes the tailgate hinges go through. the boot rubber has to be removed as the van shell has its own rubber.
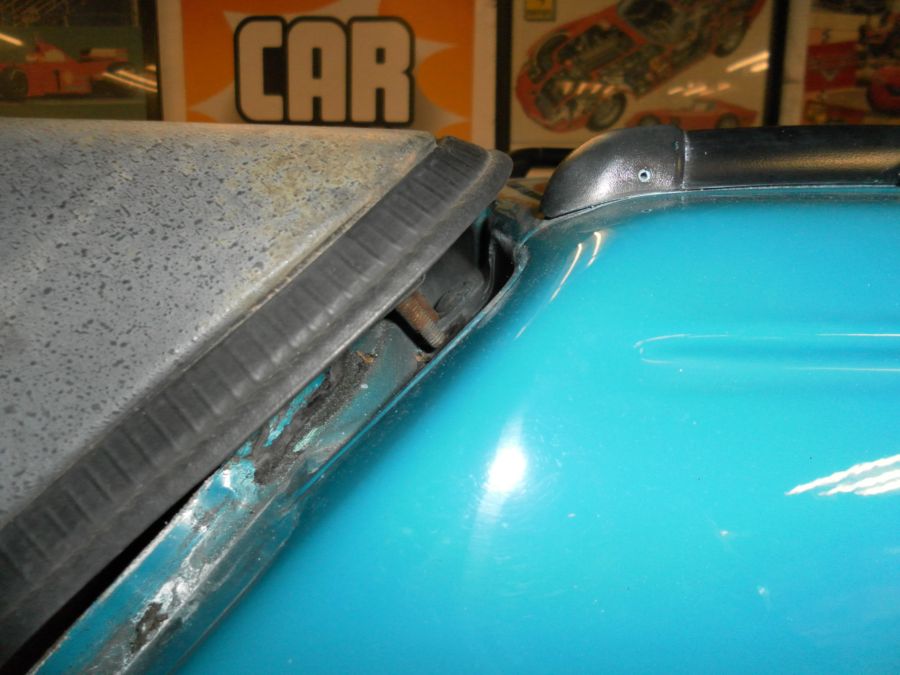
The holes didn't line up, they were about 2mm out and I had to file the holes a little sideways to allow the bolts to drop through. You can see them in the top right of the shell.
Once the holes ar aligned the shell just lines itself up really and bolts up using the nuts for the tailgate. You can see in this photo the bottom half is still missing.

I fitted the bottom half once I made sure the top was ok and tack welded it on.
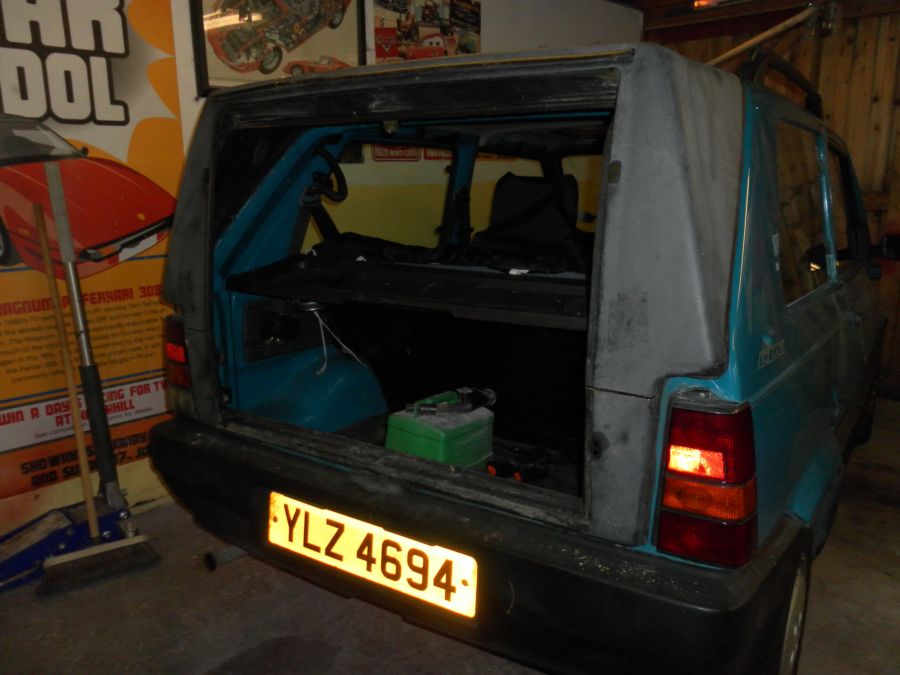
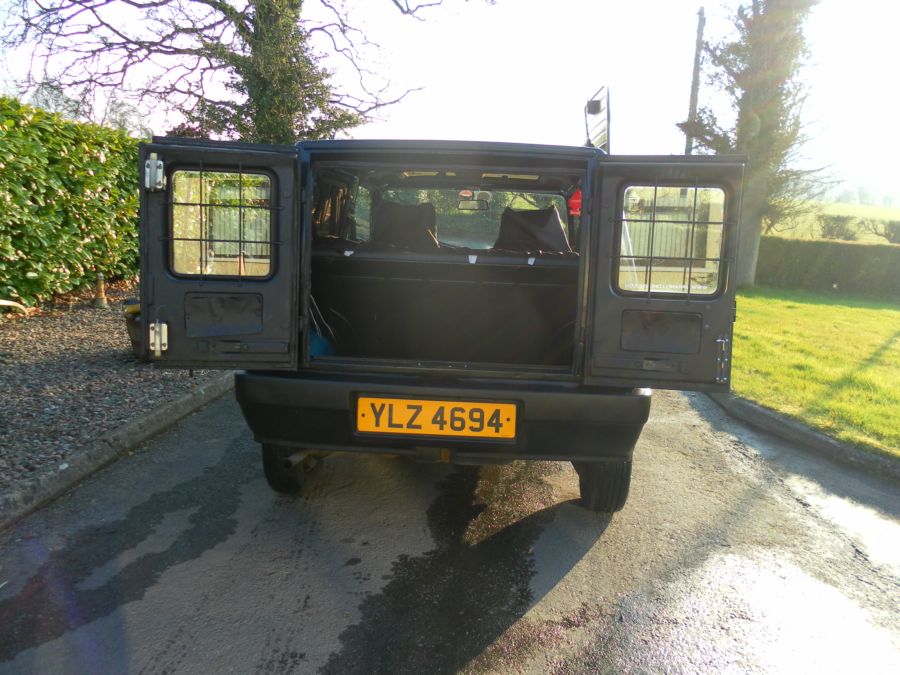
And put the doors on to see if they aligned ok. They were spot on first go.
I was very happy at how easily it all fits together. I took it all off again and re-fitted the tailgate. I'll fully weld up the 2 shell pieces and got paint today to spray the shell, doors and side panels. Rele also sent me the panel that goes behind the front seats in a panda van but I don't need to use it at the moment as I'm keeping the rear seats in the car. He had to bend it in 2 to send it in the post.
12/03. Work is progressing. That's the shell weled back together.
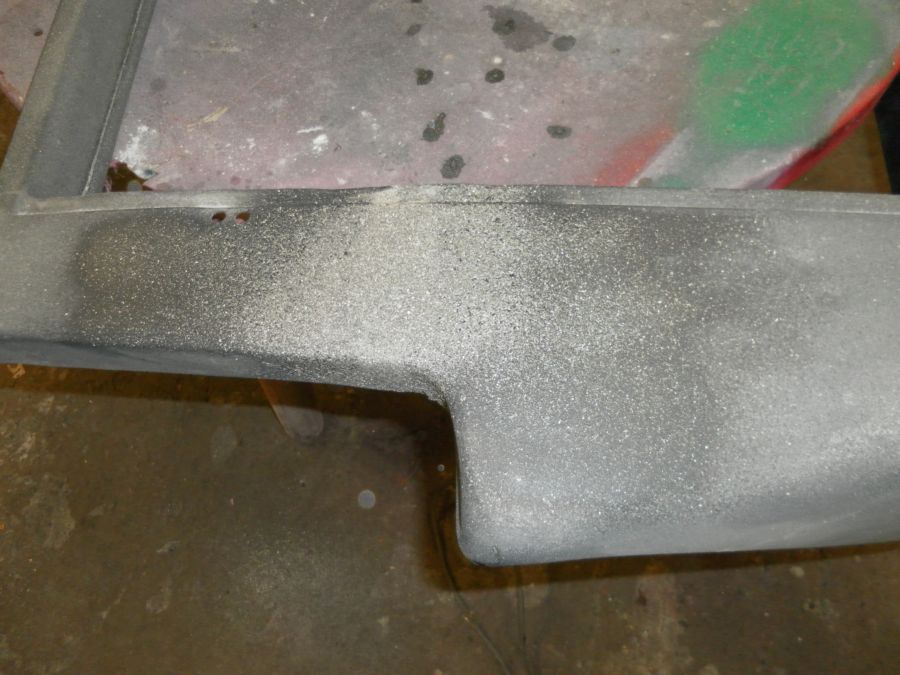
To finsh the join off I used a thin layer of fillers, this created a bit of an isue. The shell has a very slight textured finish to it and the filler is smooth. So I thought I'd try the stuff I used on the plenum chamber of the Ferrari to give it a textured finish. Its a rougher finish than the finish on the shell but I'll flatten it back a bit to see if I can at least come close. I rubbed all the panels down in preperation for painting.
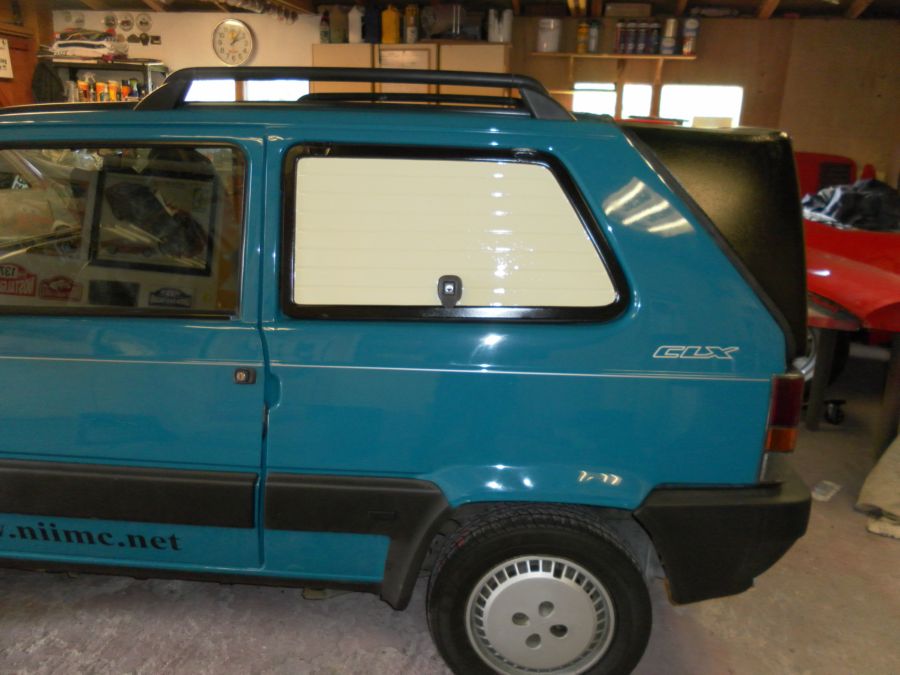
26/03. Right time to get this finished. When I got back from getting the dents take out of the 155 I got stuck into the Panda. I already had the rear bolted on so I was off to a good start. So the side panels needed done. First job was to trial fit them and make them up as holes have to be driled to secure them.
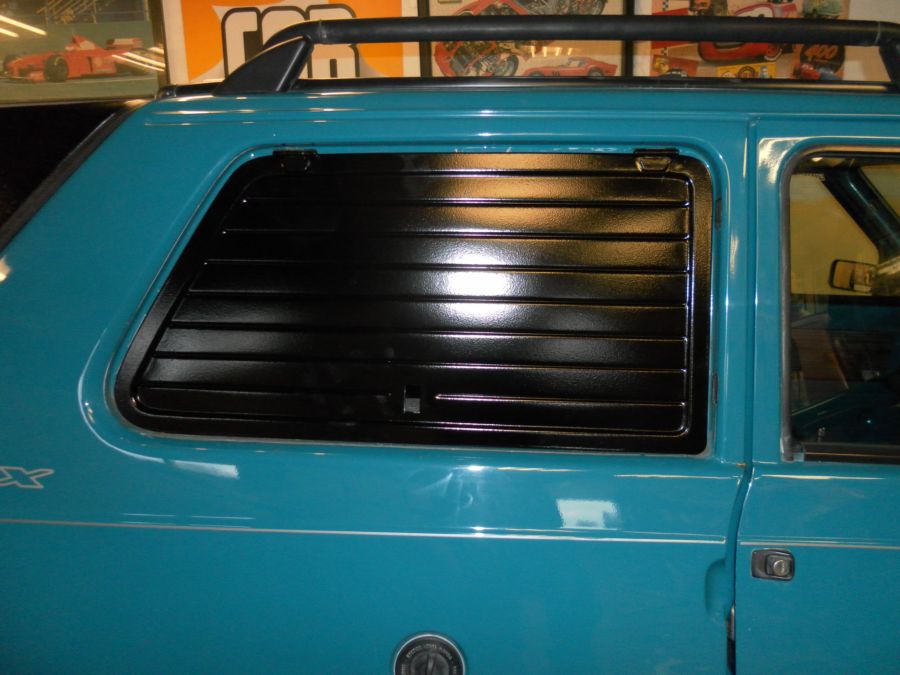
Lined up above then marked up for drilling. It takes 4 self tapping bolts to fit it.
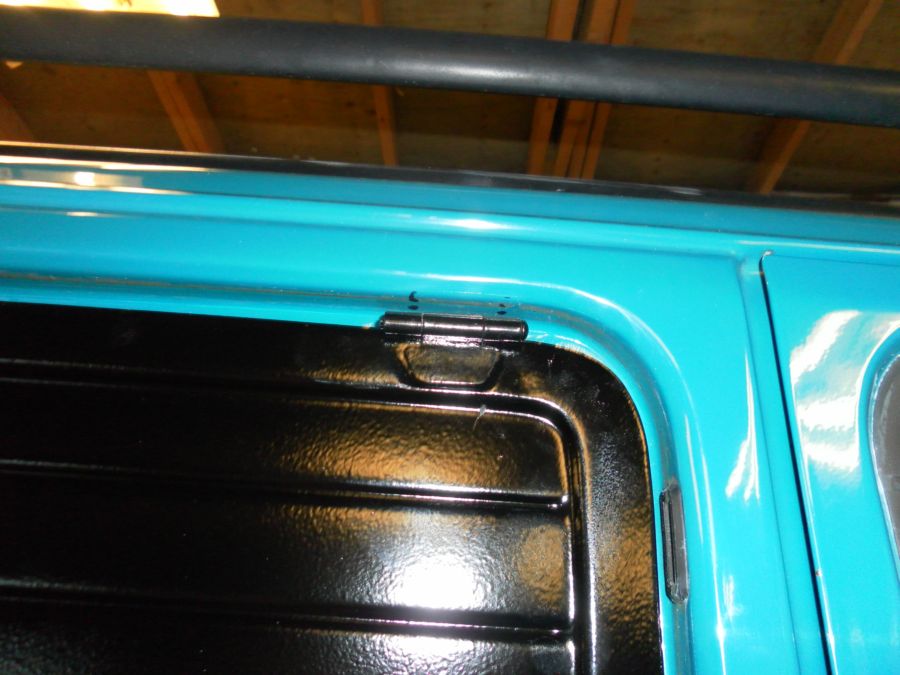
Then the plate to lock the side windows has to be fitted. Again it is 4 self tapers that locate it.
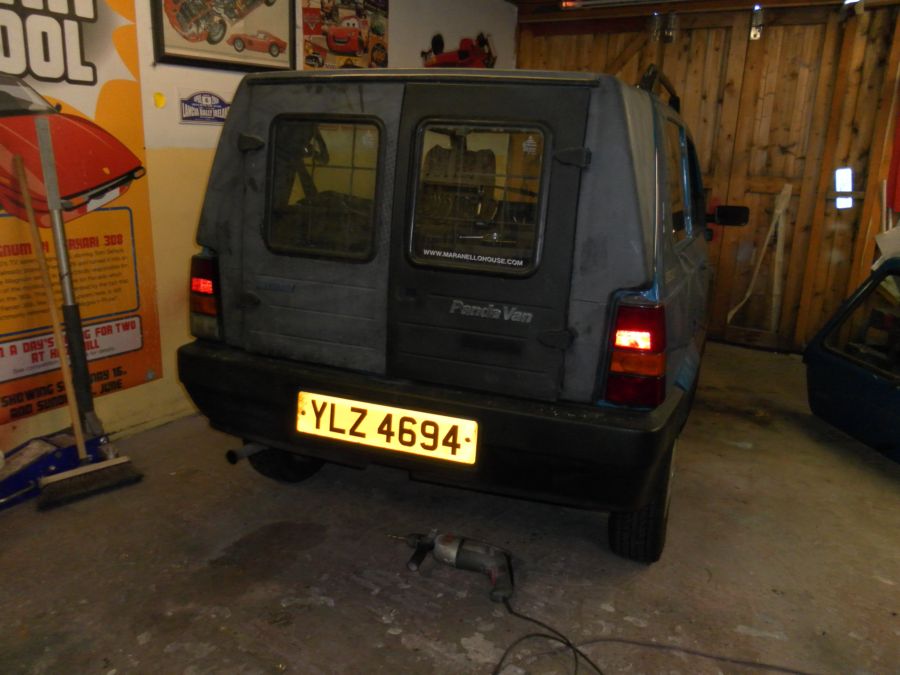
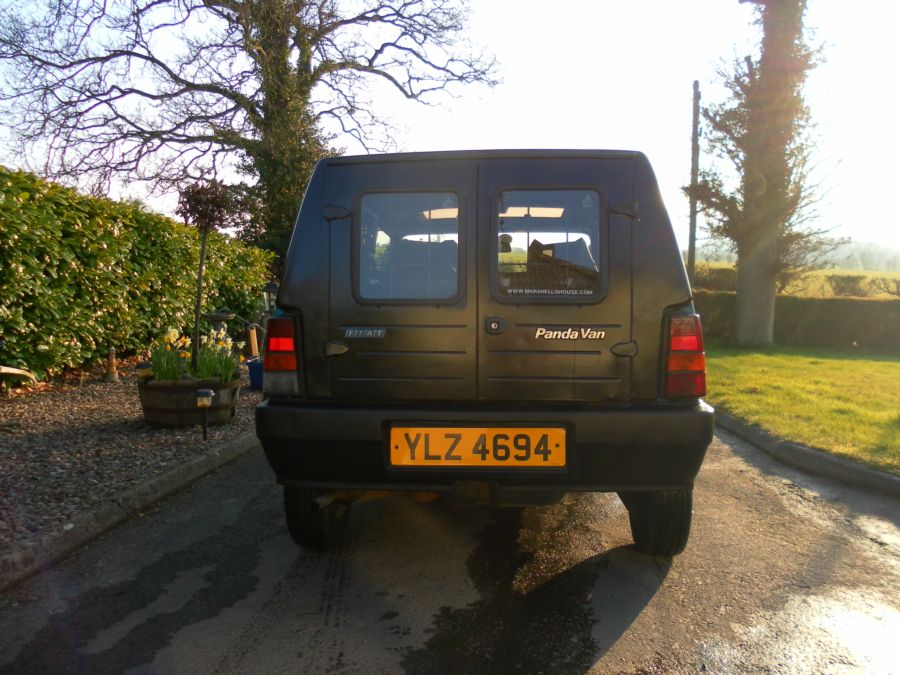
Thats really it done. It took about an hour tops to do and now I have a Panda Van.
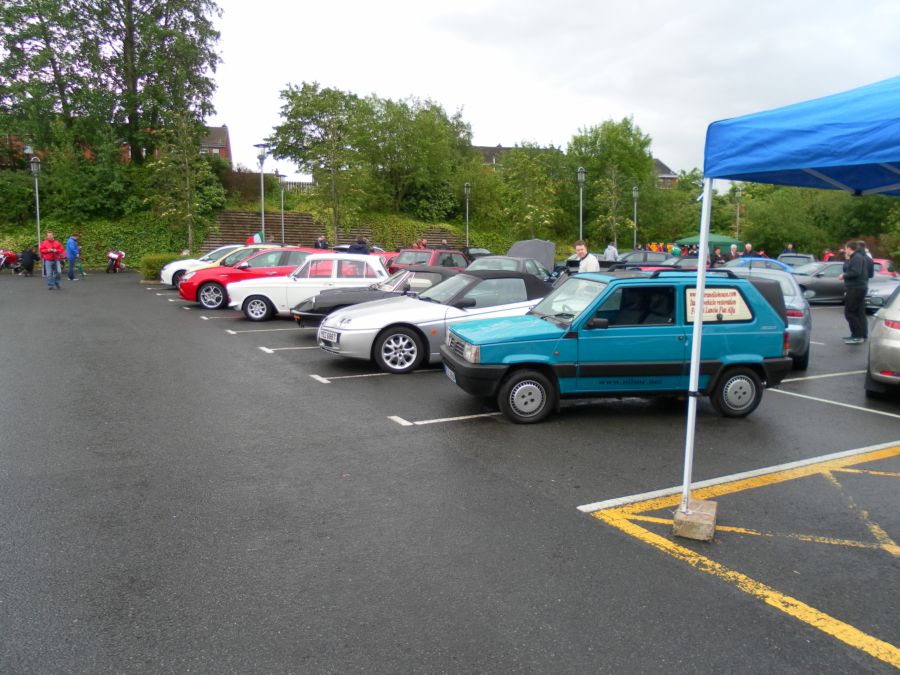
02/04. Our club meeting tonight so I gave the car a little run to this. It was in good company with my mate Jonnys Sisley there to.
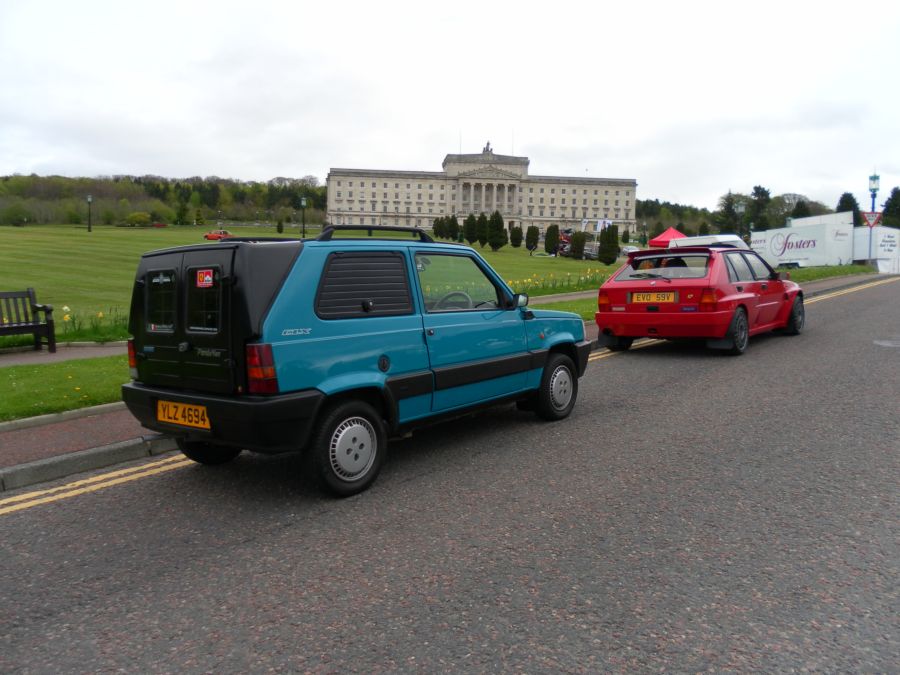
16/04. The cars first show was today and what a grand place to start off at, the Famous Stormount Building were all our countries political decisions are made. Never in my lifetime did I think that one day I'd be parking a little Panda on the drive outside it. Proud little moment that.
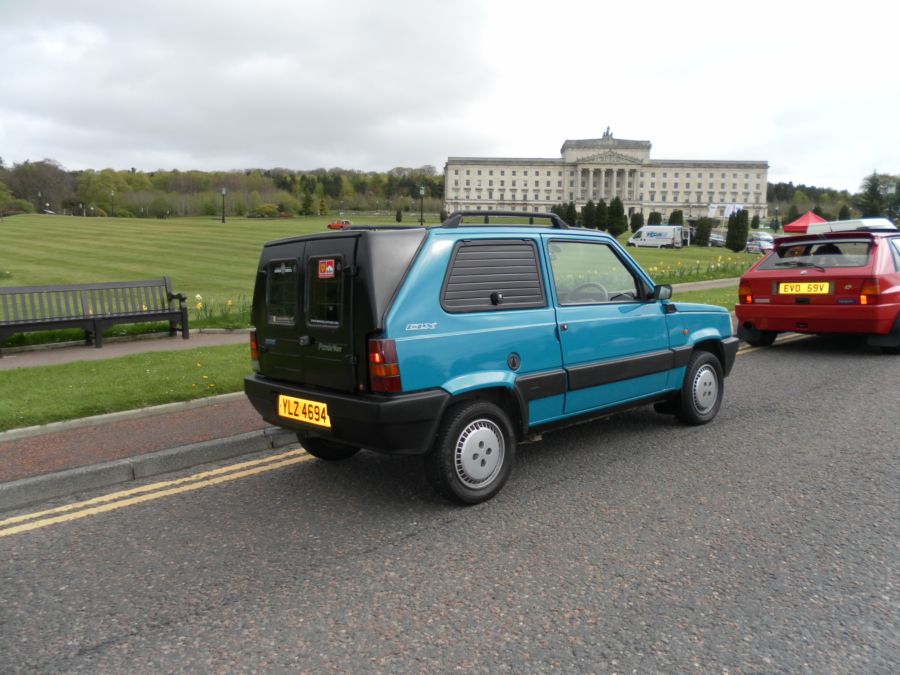
Its big brother went along to look after it. And thank you to Alan for driving the car to the event for me. I was quite taken with the response it got.
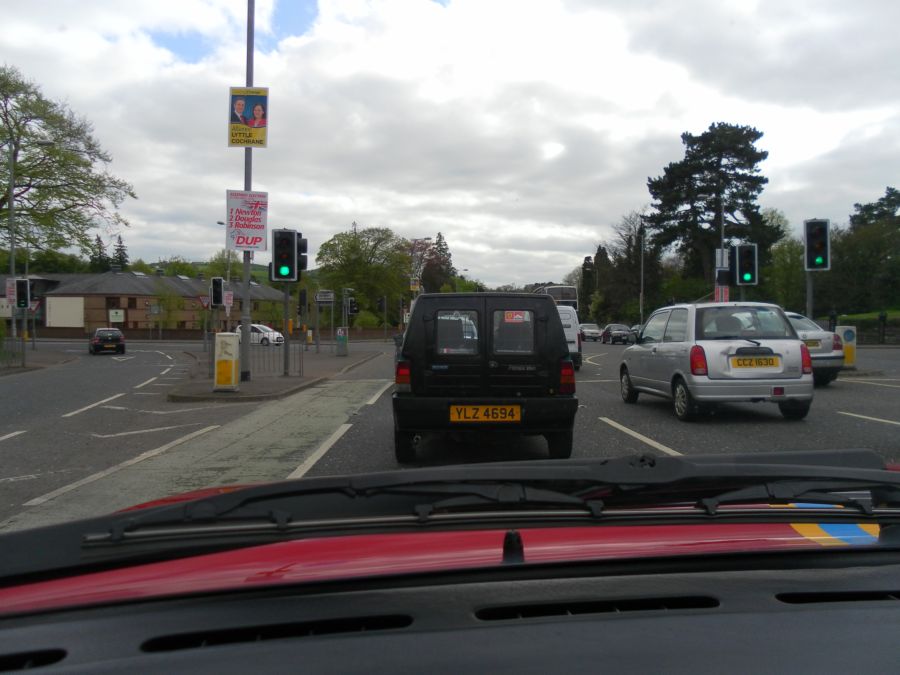
I took a photo of it as we were heading home, well its rare for me to get an opportunity to get a photo like that.
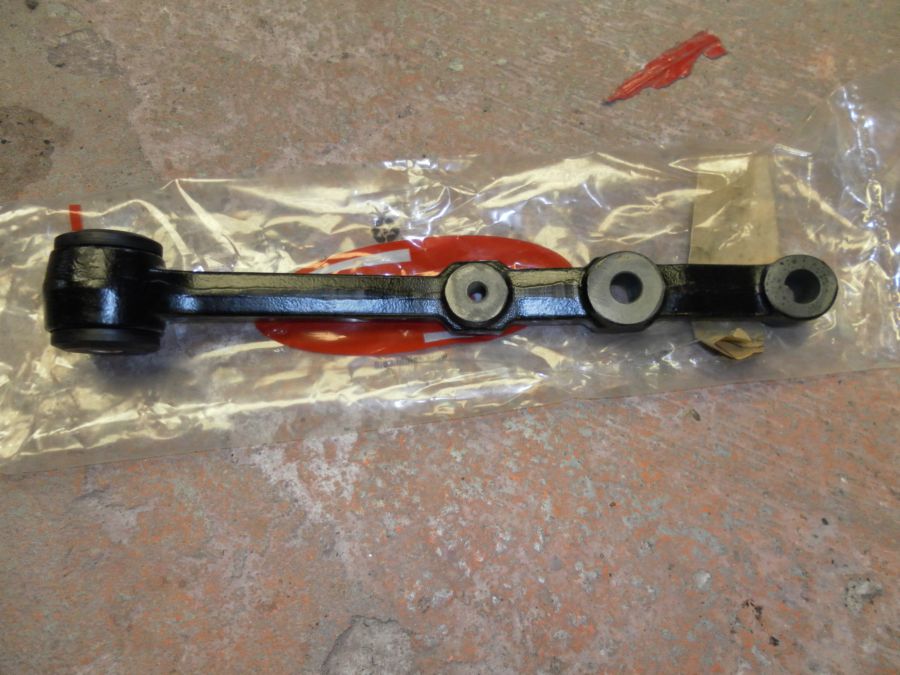
21/05. The front suspension has been feeling a bit loose over the past few weeks so I ordred up the bits to tighten everything up. Unfortunately I couldn't get both sides done as I was only able to get one lower arm. The other should be here during the week.
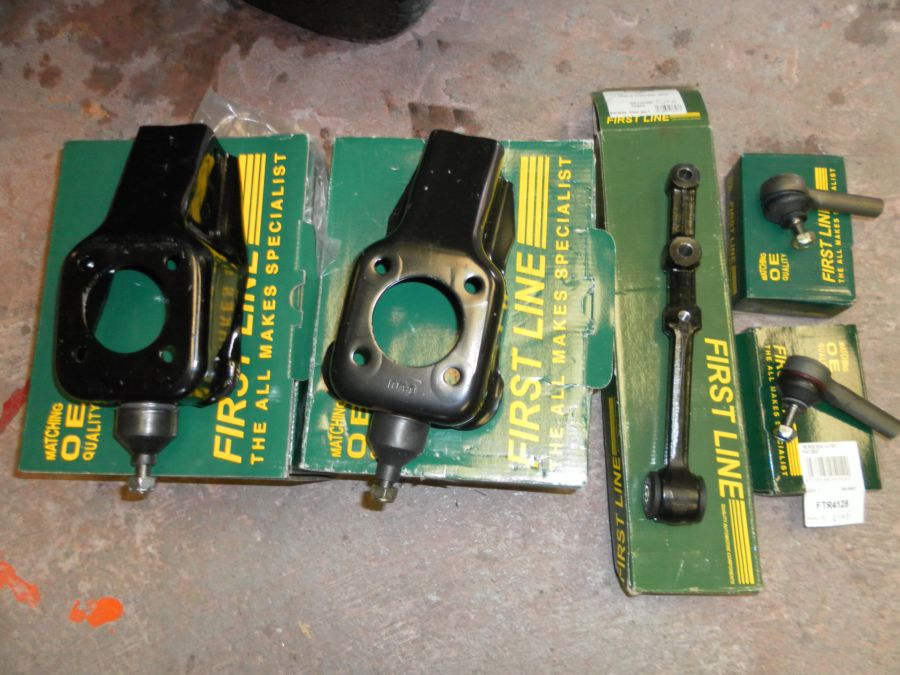
Well at least I got one side done.
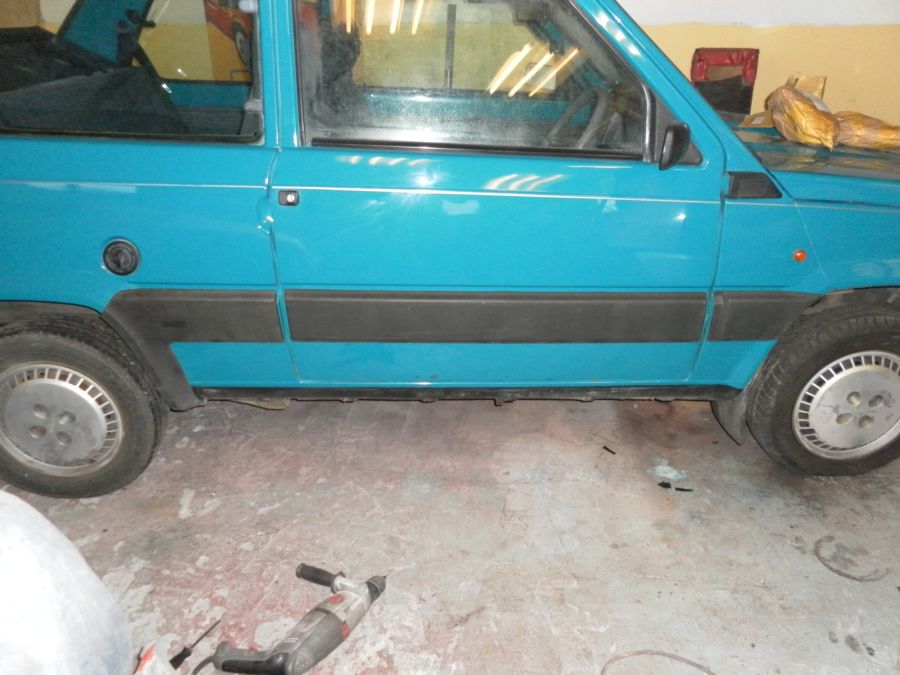
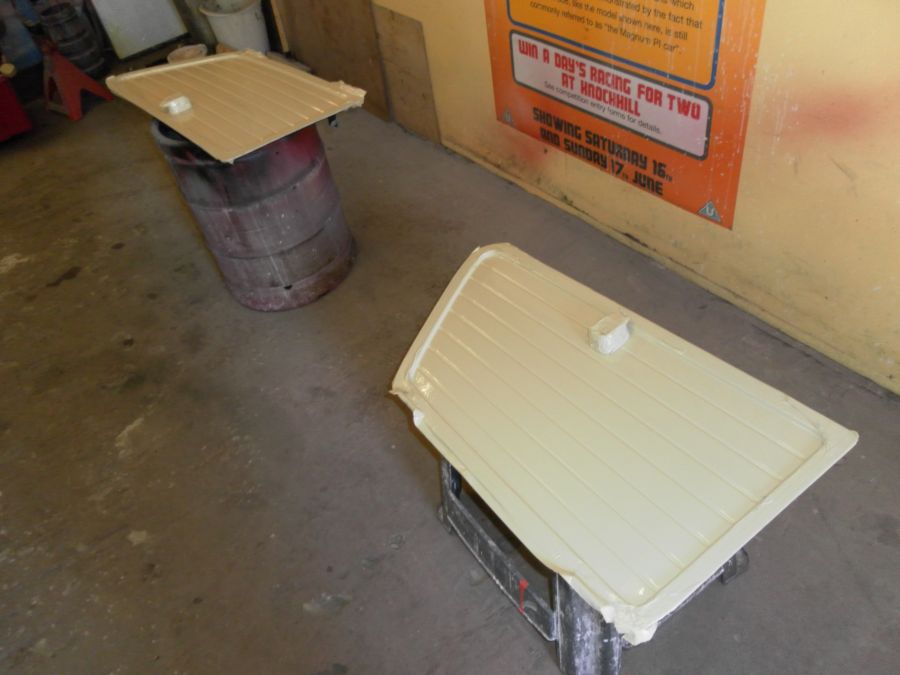
22/05. I've been planning a little thing for the car since turning it into a van. Today I started on the the plan. I painted the side panels a lovely colour of cream.
Then I fitted them back on the car.
23/05. Decided to be brave this morning and clean the engine bay up a bit. It will probably be quite a while before I do it again with the car being my daily runabout.
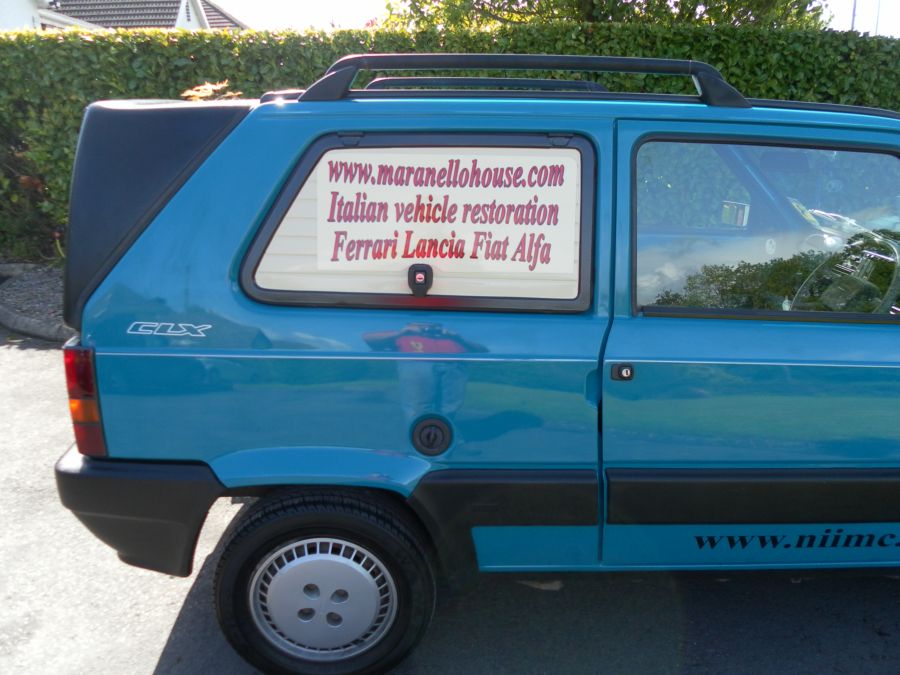
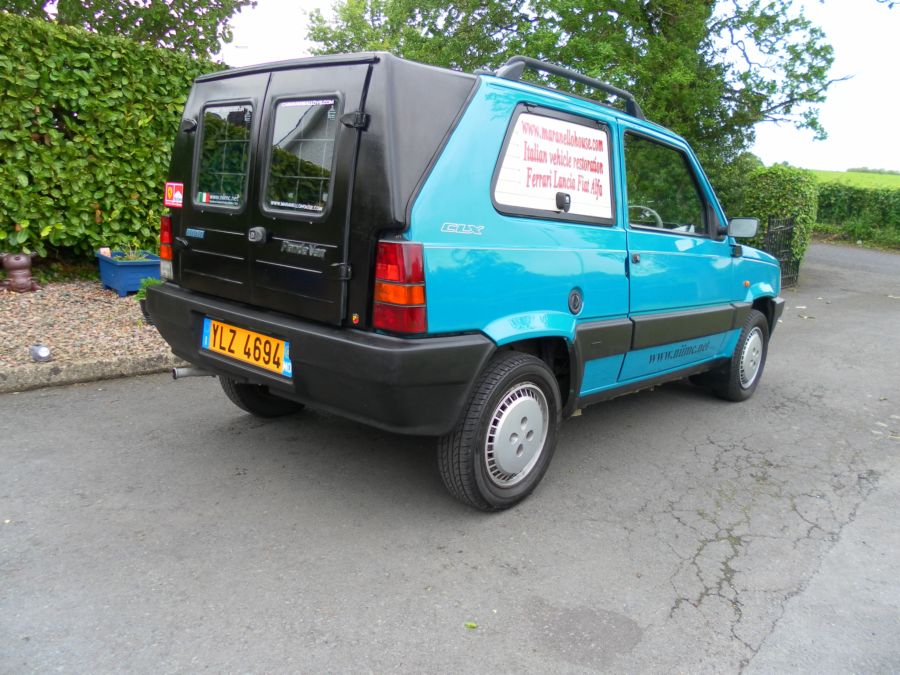
24/05. Ok I'm sure some of you have been wondering what the cream panels were about. Here's the answer.
I know I'm not in business but as its a van it was crying out for some sort of livery and I couldn't resist the old style effect. I like it.
Oh and the other lower arm came today so I hope to get it done before the weekend.
26/05. My Italian style plates came today.
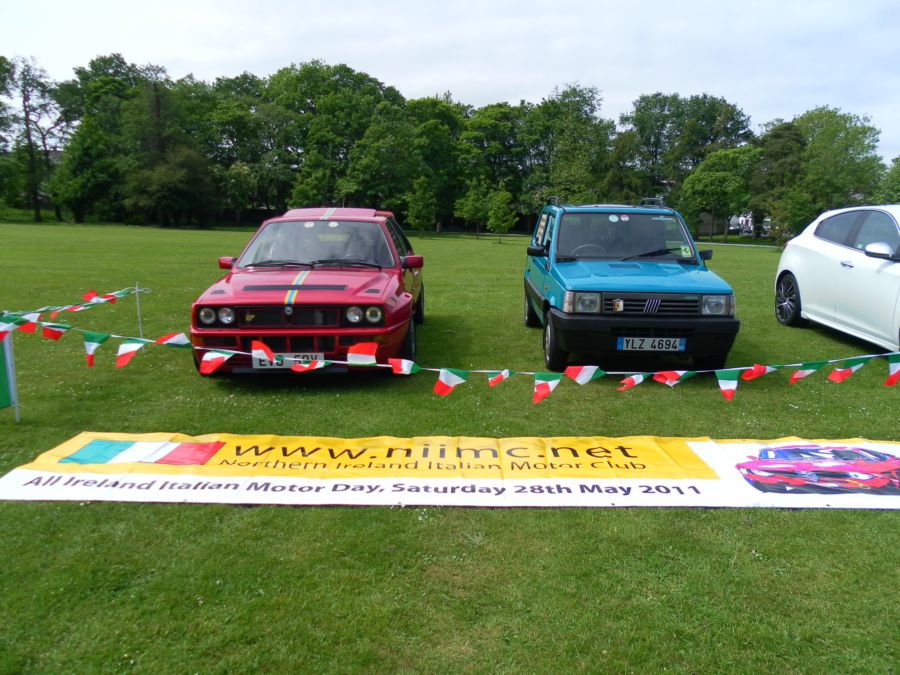
28/05. The all Ireland Italian gathering was today and of course the van had to attend. i was surprised at just how many people were interested in it.
04/06. Another show today, this time a fare we were asked to go to. I took the van and the Evo.
09/07. The new front and rear dampers arrived today. I'm hoping to get them fitted over the next few days if things go to plan.

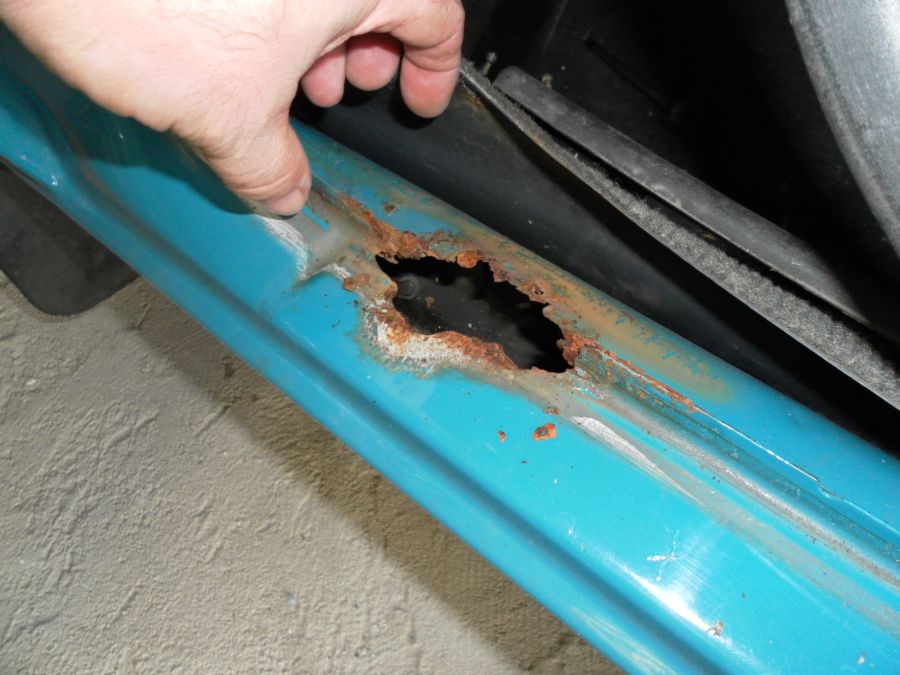
05/08. Its coming up to mot time so 3 jobs for today to have the car ready. A rusty hole in the passenger sill, change the timing belt and fit all the new dampers.
Job 1. The rusty hole. An odd place for a hole. I cut out all traces of the rust and welded in new metal.
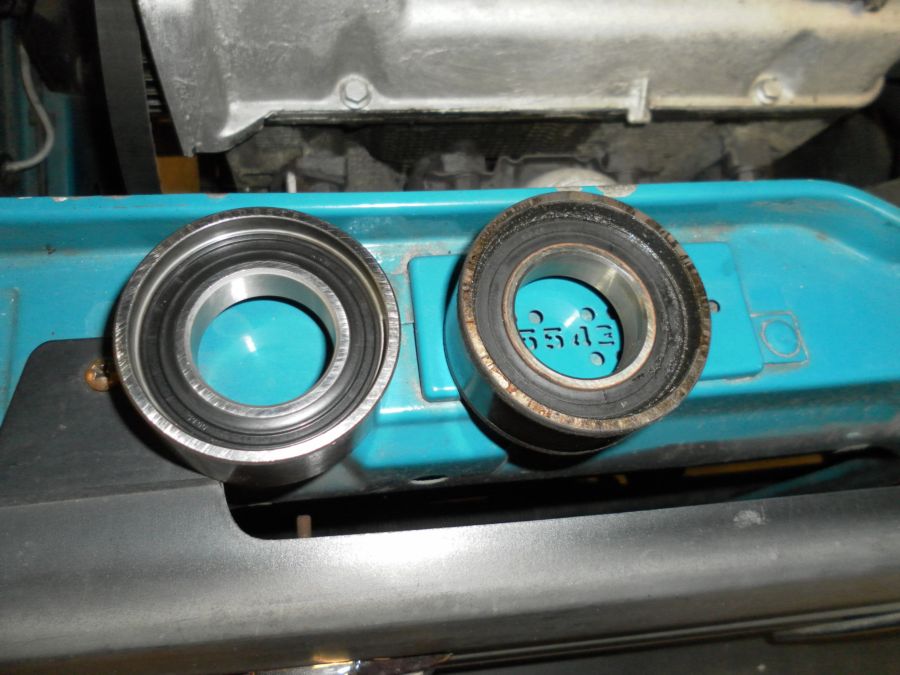
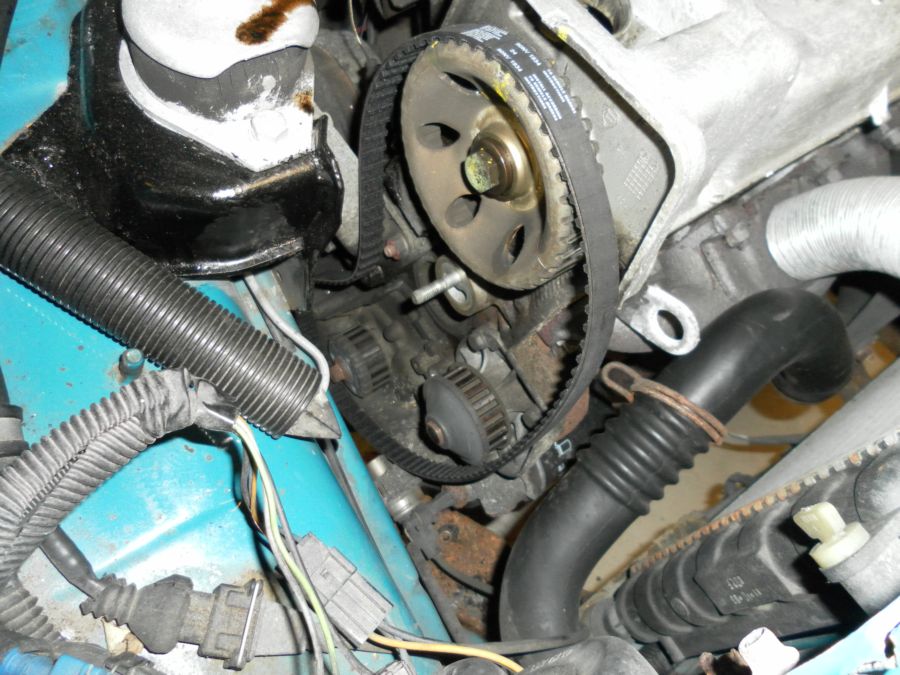
Job 2. The timing belt. I'll not go into how to do it here as its on Juppys history. The old tensioner was definately close to its sell by date as it spinning it felt like there was sand going round the bearing.
The belt wasn't actually to bad but I changed and the alternator belt as well.
Job 3. changing all the dampers. rears are very easy, 2 17mm nuts have to come off and then the damper should pull off.
Top.
bottom
done.
Fronts take a bit time. To get it out start with disconnecting the track rod end joint and the brake pipe. Then take out the 2 17mm bolts and nuts that hold the damper to the hub.
Then take off the 2 13mm nuts that hold the damper to the turret. and out it comes.

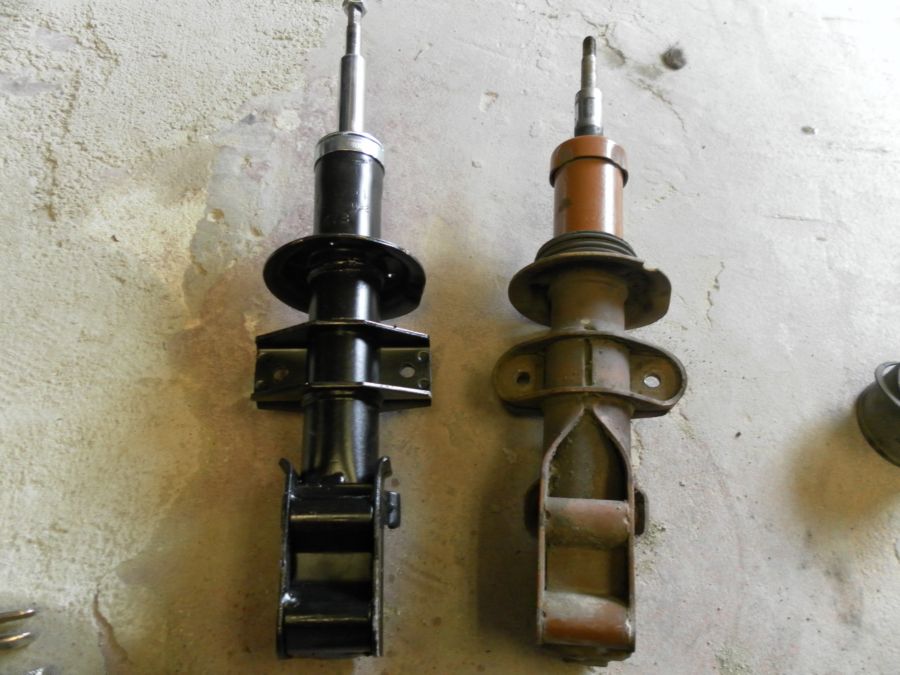
Old damper with the spring still on and the new one to go on.
When taking the spring off you must use a good set of spring compressors and use 2 of them. Its a job I always worry a little about when doing as I've seen one spring off and they can do some damage. So compressors on and tighten them up.
When they have tightened up enough to give plenty of play in the damper the top 17mm nut has to come off. Ideally you should use a 17mm spanner and a smaller one that goes onto the tip of the damper just above the nut but as the damper is being scrapped I just use grips to hold the shaft of the damper so I can release the nut.
And a photo to show the sequence of parts as they come off the damper, going from right to left.
old and new dampers
Just put everything back on as you took it off and job done. My little car is ready for mot now.
31/08. Actually the car wasn't ready. After I got all the suspension on I checked the trailing arms and they are both in a bad way. I had a feeling the bushes were on their way out as the car has always felt a little loose on the rear. So I went tonight and took the trailing arms off the French Panda. They are straight forward to take off, 17mm nuts and bolts as circled. The only thing is the handbrake cable has to be taken off the drum as it is fed through. Takes about 20mins to do one side.
Once I had the good arms off I painted them just to tidy them up. You can see the bush coming apart on the old arm.
Then another 20mins had the replacements on. I've a slow puncture on the front passenger side so while getting that sorted I'm going to get my mate who owns the tyre place to do the tracking and set the headlights and that will be everything done, "I hope".
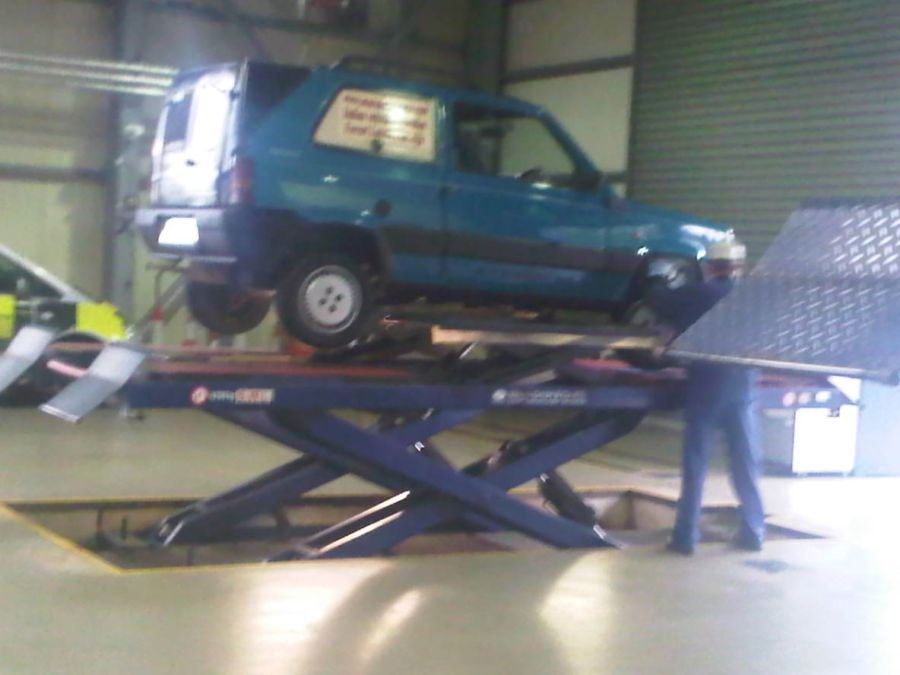
02/09. Mater as the kids have now named him went for MOT tonight and passed without a single issue. Tester even commented how clean he was underneath. Very pleased.
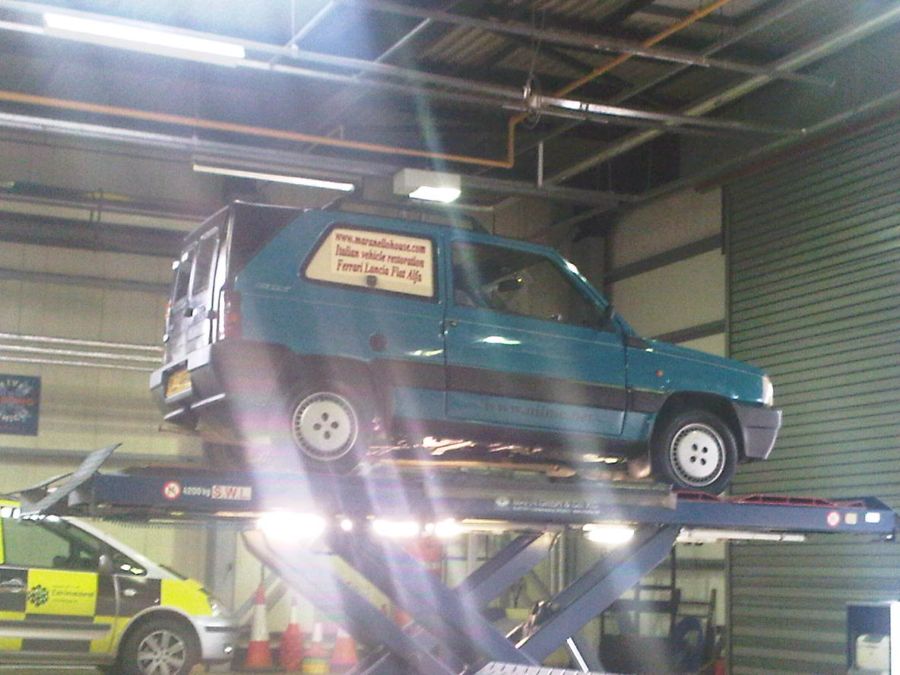
This photo didn't come out to well I'm afraid.
05/02. I bought this Panda on 01/02 as a non runner with intention of putting it back on the road and turning it into a Panda van. Today was the first I even seen it in daylight as I'd bought it at night in the pouring rain. My mate Steven who was up visiting from Killarney got roped in to helping me tow the car home.
So the first thing I did was to see why the car wouldn't start. The owner said the fuel pump had packed so I swapped the one out of the French Panda only to discover that the fuel line in the engine was cut in 2 and the fuel was going straight to the ground. Fuel line fixed, pump in, turn the key and the car started first go. time for the usual first photo's to show how the car is before I start work.
Overall the car is in pretty good shape. The drivers door is just starting to show signs of rust at the bottom but its early enough to stop before it gets worse.
The passenger side front wing has had a knock at some point and the hole were you get to the door hinge needs looked at.
The interior is a bit worse for wear but everything works if a bit grubby.
It even has a radio, and speakers.
The engine seems to be fineand I don't see any oil leaks which is good but I see the airbox is held together with a cable tie. That will need sorted. And I have no idea what that spare wheel is from but its not a Panda.
The interior of the Jolly is in better shape than the CLX's so I started with the steering wheels.
Next was the seats. I know they are equally dirty but the ones from the French car are more comfy and they will clean up.
When I got the seats out of the car I got the vacumn out, of all the cars I've owned I don't think I've ever seen one dirtier.
I changed the door mirrors to as the ones on the CLX aren't adjustable from the inside. With all that out of the way I took a look at the drivers window winderas it was only going up 3/4 way then clicking. turned out the mechanism was broke and need replaced. The French panda has electric windows which I'm saving for the Sisley so I had to take the mechanism out of the Sisley.
While I was trying to sort the window it started to rain. The window wouldn't go all the way down to allow me to get the Mechanism lined up and it wasn't until I was properly soaked that I figured out why. A big lump of wood was inside the door which must have been there to hold the window closed. Next step is to get the car into the garage and see how well the paint comes up.
12/02. I got the car into the garage today and started to G3 polish the paint to see how it would come up. I didn't work at it to long as I've been ill for what seems ages now and am just to run down to keep at it. The paint is actually coming up very well which should tidy the car up a bit. The bit on the bottom left of the photo is the bit of the roof that I haven't done.
Also one of 2 parcels arrived yesterday from my friend Rele in Serbia containing Panda Van doors and side panels. The rest should arrive next week at some point. I'm really looking forward now to getting the van theme started.
19/02. New oil filte, air filter and plugs to go in today to start with.
And as I was setting about changing the oil the new brake discs arrived. I didn't do a photo set on how to change them because you'll get that on Juppys restoration page. However as you can see the discs were in a bad state so badly needed done. I fitted new pads to even though the pads on the car had very little wear.
I'm using the side mouldings and the roof bars from the French Panda so the next was spent taking them off the car and working out how I'm going to stick them to the car as it has no holes in the doors and I'm not going to start drilling holes in good doors.
I decided to use a strong rubberised adhesive that will move slightly, this should allow the mouldings a bit of flexibility and cushioning when the doors are closed etc. It should work!
20/02. Roof bars to be fitted this morning. I'm using the ones from the French Panda so everythings there that I need. First job is to set the bars on the roof and measure them for the right position.
Once done 4 holes have to be drilled. Once I drilled them I treated them to a little rust earter to be sure it doesn't get hold.
The brackets have to be fitted through holes on the inside of the roof rail. Very handy little brackets they are to, they have an arm to hold and guide to the right place.
And in place ready to line up with the rail.
23/02. Bit of a rush on last night and early this morning as the Merc had to be left in to have work done on it and I don't know when I'll get it back so I now need the Panda on the road. Thankfully all I had left to do was fit a new wiper motor assembly, (done last night) fit the wheel trims, re-attach the front and rear bumpers on one side and put some petrol in. The car is definately turning out a lot better than I thought it would. So stage 1 of turning it into a van is now complete. Once the rest of the parts arrive that my friend Rele in Surbia sourced for me the final stage will begin.
26/02. Since getting the car on the road it has had a pretty bad rumbling noise and a bad vibration coming from the pasenger side front. I suspect its a wheel bearing and UV joint both going. So the plan for today was to take the complete pasenger side suspension out of the French car and fit it to the blue one. It would be much faster and easier to do. So I checked that both were the same to be sure.
Then it was a straight forward process. take off the brake caliper, undo the guide bar, take out the lower wishbone, undo the 2 13mm bolts that clamp the steering bar and put it out of the way (by doing that you don't need to remove the track rod ends), undo the 4 13mm bolts to release the drive shaft and then pull it out making sure the oil goes into a container, and lastly undo the 2 13mm nuts holding in the damper from inside the engine bay. Hey presto and it all comes out as one unit.
Once out as one piece there's not much left.
And in just over an hour I had the swap done on both cars and back on their wheels. Quick test drive and no more noise. The cars is really running sweet now.
27/02. I had a little time this morning so decided to check out the doors of the van section in case they need anything. First thing that struck me was there is no key for the lock.
The barrel looks to be the same as whats on the boot of the Panda so I'm wondering if I can swap the barrels. I took the lock out and the locking mechanism so I can put some grease round it to make sure its free in the future.
Then I started taking the lock apart but it started raining very heavily so I wasn't for seeing if the barrels match. I'll check that one later.
The other door pulls open using just a wire to release the 2 locks. However the wire has broken so I'll have to have a think about how to replace it because it seems to have been crimped into the ends of each lock.
03/03. The final piece of the van parts arrived this morning so big thank you to Rele from Serbia for sending me everything right down to the last nut and bolt. Without him sorting everything I wouldn't be ready to make a Panda van. As you can see it came in 2 bits. Relel had to cut it in 2 because the post wouldn't take it as one piece saying it was to big. Its made of metal so no problem welding it back together.
It should sort of be like this.
05/03. Haven't got a lot of time today as I want to get the Alfa ready for the mot but I do want to trial fit everything to see if I need to modify anything. removing the tailgate was the first job. It is only hled on with 4 10mm nuts and the piston to hold the gate up so 10 mins had it off.
The van rear top has 4 welded bolts that go through the same holes the tailgate hinges go through. the boot rubber has to be removed as the van shell has its own rubber.
The holes didn't line up, they were about 2mm out and I had to file the holes a little sideways to allow the bolts to drop through. You can see them in the top right of the shell.
Once the holes ar aligned the shell just lines itself up really and bolts up using the nuts for the tailgate. You can see in this photo the bottom half is still missing.
I fitted the bottom half once I made sure the top was ok and tack welded it on.
And put the doors on to see if they aligned ok. They were spot on first go.
I was very happy at how easily it all fits together. I took it all off again and re-fitted the tailgate. I'll fully weld up the 2 shell pieces and got paint today to spray the shell, doors and side panels. Rele also sent me the panel that goes behind the front seats in a panda van but I don't need to use it at the moment as I'm keeping the rear seats in the car. He had to bend it in 2 to send it in the post.
12/03. Work is progressing. That's the shell weled back together.
To finsh the join off I used a thin layer of fillers, this created a bit of an isue. The shell has a very slight textured finish to it and the filler is smooth. So I thought I'd try the stuff I used on the plenum chamber of the Ferrari to give it a textured finish. Its a rougher finish than the finish on the shell but I'll flatten it back a bit to see if I can at least come close. I rubbed all the panels down in preperation for painting.
26/03. Right time to get this finished. When I got back from getting the dents take out of the 155 I got stuck into the Panda. I already had the rear bolted on so I was off to a good start. So the side panels needed done. First job was to trial fit them and make them up as holes have to be driled to secure them.
Lined up above then marked up for drilling. It takes 4 self tapping bolts to fit it.
Then the plate to lock the side windows has to be fitted. Again it is 4 self tapers that locate it.
Thats really it done. It took about an hour tops to do and now I have a Panda Van.
02/04. Our club meeting tonight so I gave the car a little run to this. It was in good company with my mate Jonnys Sisley there to.
16/04. The cars first show was today and what a grand place to start off at, the Famous Stormount Building were all our countries political decisions are made. Never in my lifetime did I think that one day I'd be parking a little Panda on the drive outside it. Proud little moment that.
Its big brother went along to look after it. And thank you to Alan for driving the car to the event for me. I was quite taken with the response it got.
I took a photo of it as we were heading home, well its rare for me to get an opportunity to get a photo like that.
21/05. The front suspension has been feeling a bit loose over the past few weeks so I ordred up the bits to tighten everything up. Unfortunately I couldn't get both sides done as I was only able to get one lower arm. The other should be here during the week.
Well at least I got one side done.
22/05. I've been planning a little thing for the car since turning it into a van. Today I started on the the plan. I painted the side panels a lovely colour of cream.
Then I fitted them back on the car.
23/05. Decided to be brave this morning and clean the engine bay up a bit. It will probably be quite a while before I do it again with the car being my daily runabout.
24/05. Ok I'm sure some of you have been wondering what the cream panels were about. Here's the answer.
I know I'm not in business but as its a van it was crying out for some sort of livery and I couldn't resist the old style effect. I like it.
Oh and the other lower arm came today so I hope to get it done before the weekend.
26/05. My Italian style plates came today.
28/05. The all Ireland Italian gathering was today and of course the van had to attend. i was surprised at just how many people were interested in it.
04/06. Another show today, this time a fare we were asked to go to. I took the van and the Evo.
09/07. The new front and rear dampers arrived today. I'm hoping to get them fitted over the next few days if things go to plan.
05/08. Its coming up to mot time so 3 jobs for today to have the car ready. A rusty hole in the passenger sill, change the timing belt and fit all the new dampers.
Job 1. The rusty hole. An odd place for a hole. I cut out all traces of the rust and welded in new metal.
Job 2. The timing belt. I'll not go into how to do it here as its on Juppys history. The old tensioner was definately close to its sell by date as it spinning it felt like there was sand going round the bearing.
The belt wasn't actually to bad but I changed and the alternator belt as well.
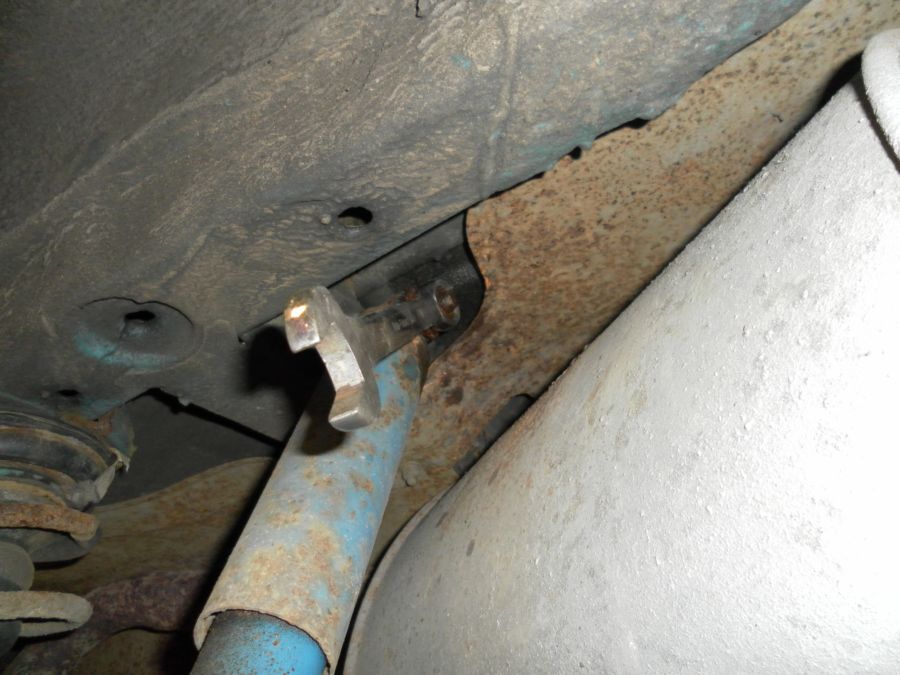
Job 3. changing all the dampers. rears are very easy, 2 17mm nuts have to come off and then the damper should pull off.
Top.
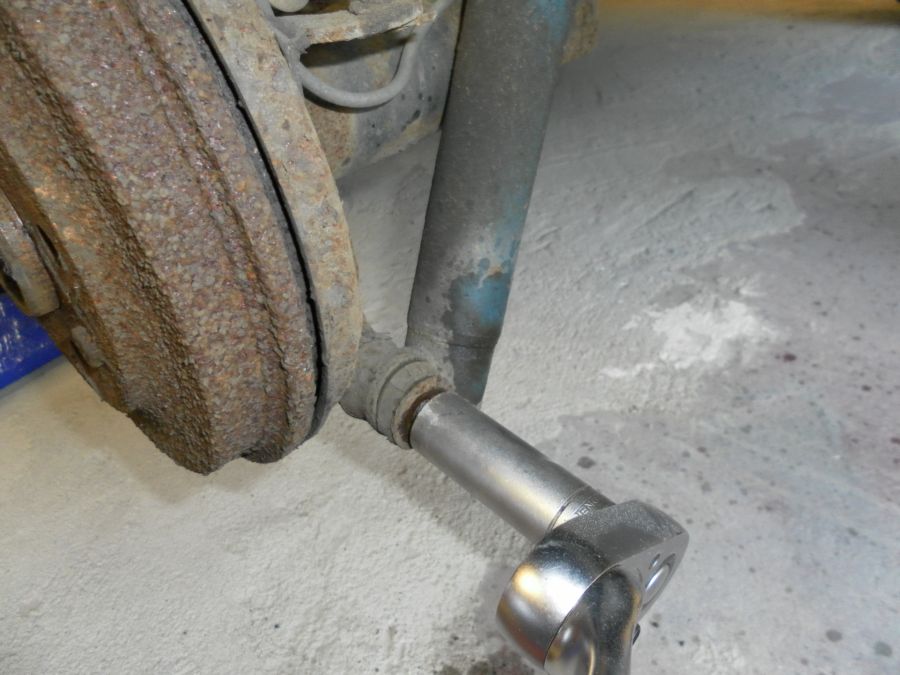
bottom
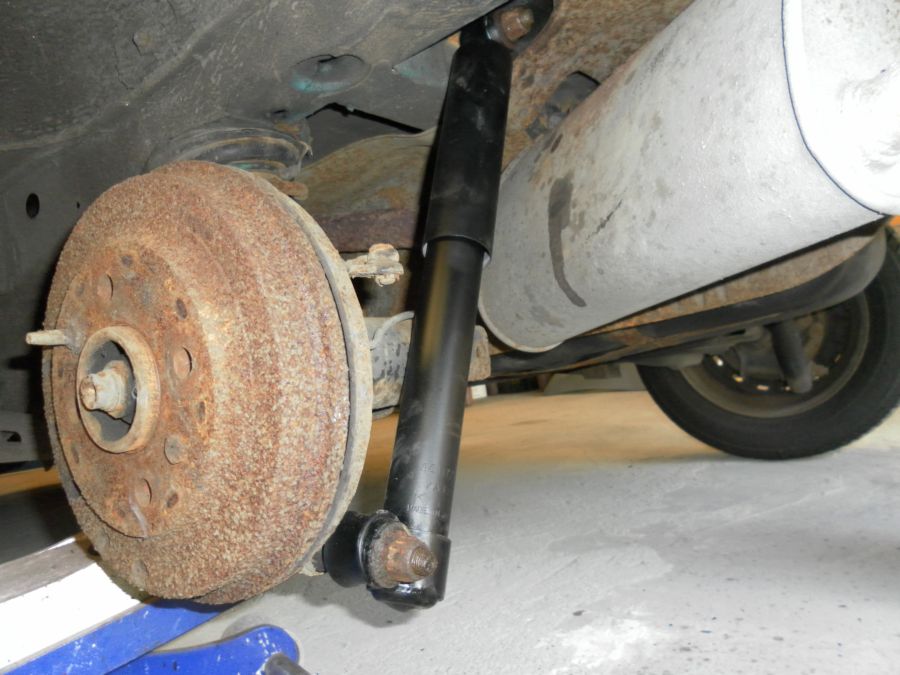
done.
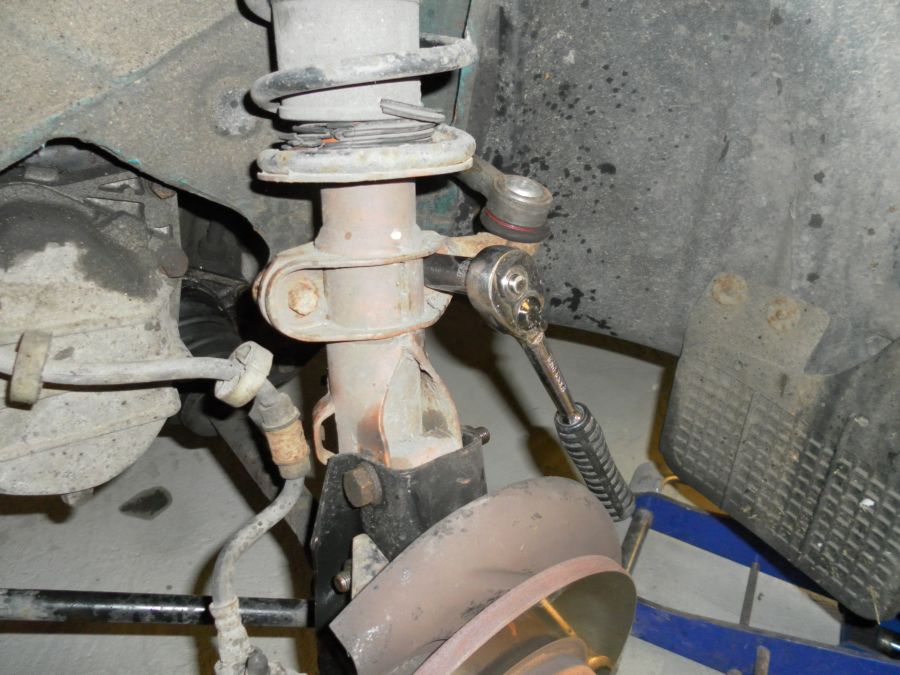
Fronts take a bit time. To get it out start with disconnecting the track rod end joint and the brake pipe. Then take out the 2 17mm bolts and nuts that hold the damper to the hub.
Then take off the 2 13mm nuts that hold the damper to the turret. and out it comes.
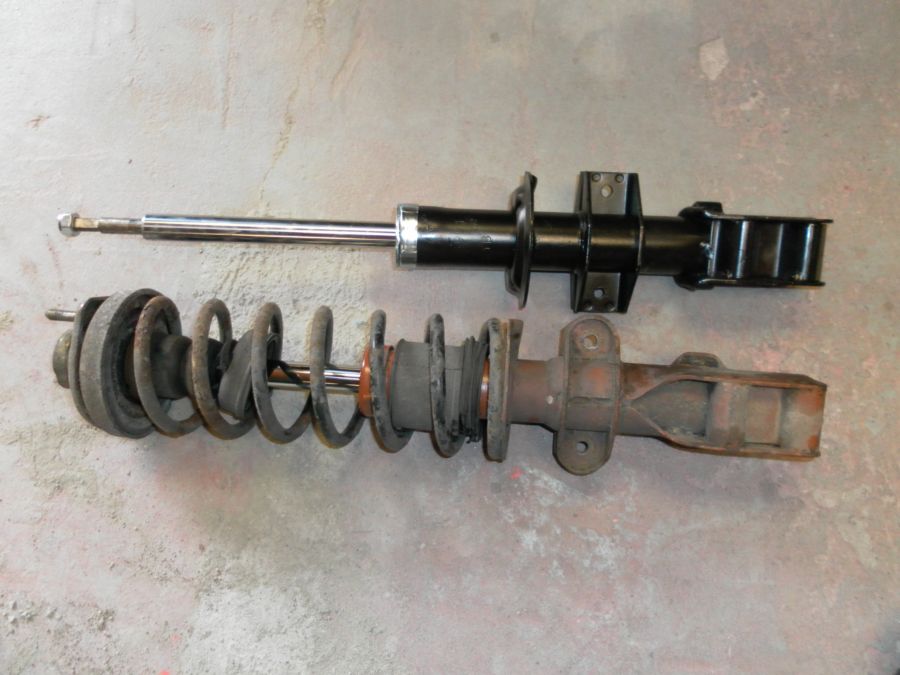
Old damper with the spring still on and the new one to go on.
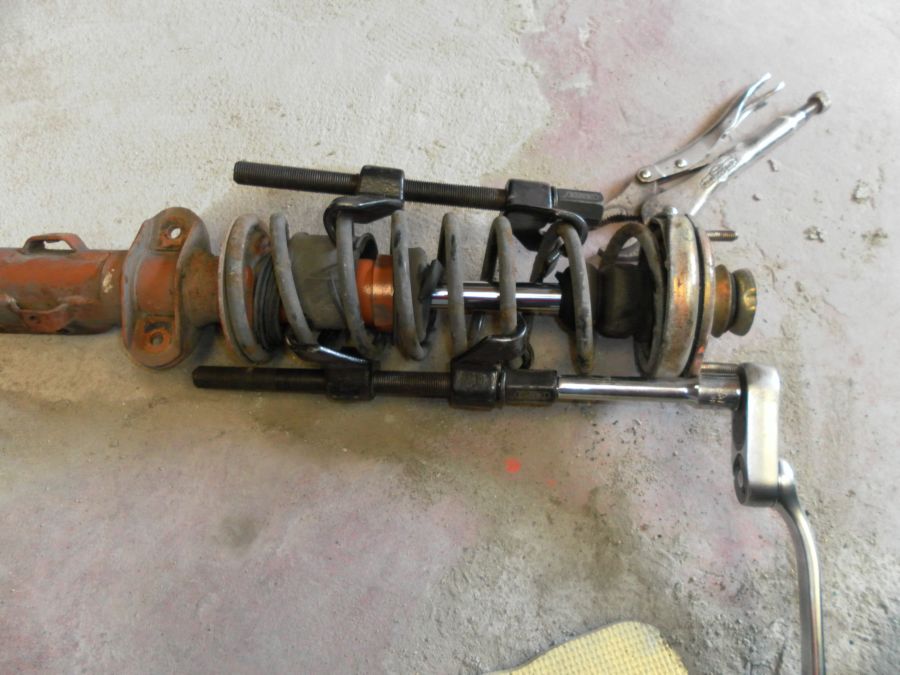
When taking the spring off you must use a good set of spring compressors and use 2 of them. Its a job I always worry a little about when doing as I've seen one spring off and they can do some damage. So compressors on and tighten them up.
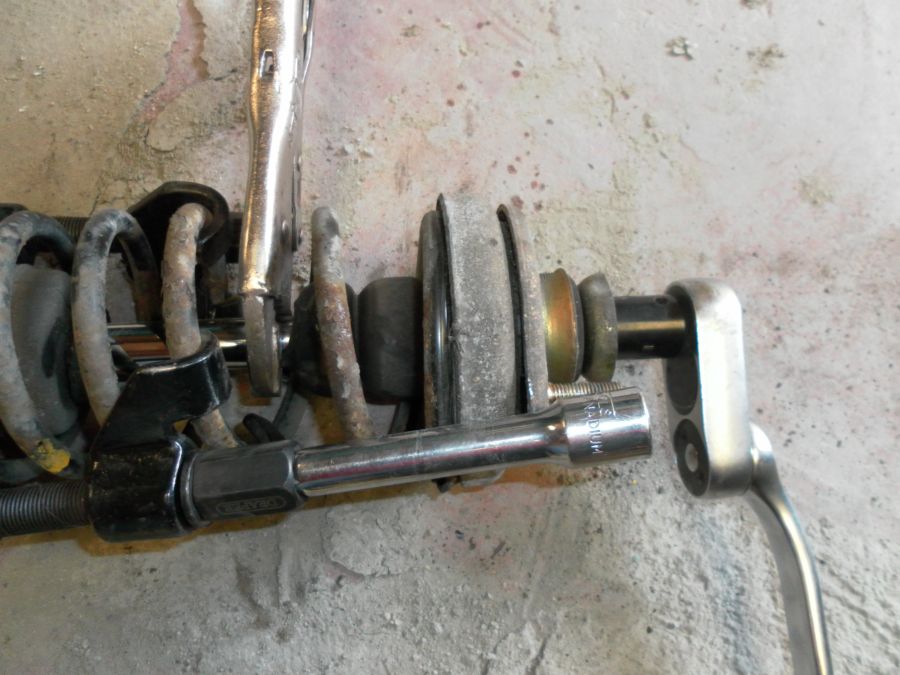
When they have tightened up enough to give plenty of play in the damper the top 17mm nut has to come off. Ideally you should use a 17mm spanner and a smaller one that goes onto the tip of the damper just above the nut but as the damper is being scrapped I just use grips to hold the shaft of the damper so I can release the nut.
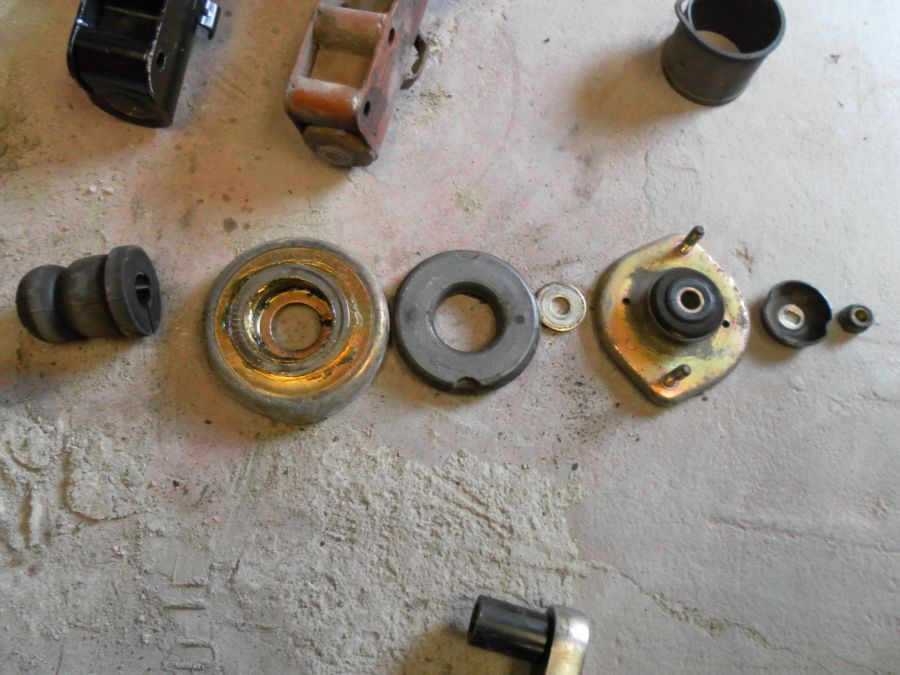
And a photo to show the sequence of parts as they come off the damper, going from right to left.
old and new dampers
Just put everything back on as you took it off and job done. My little car is ready for mot now.
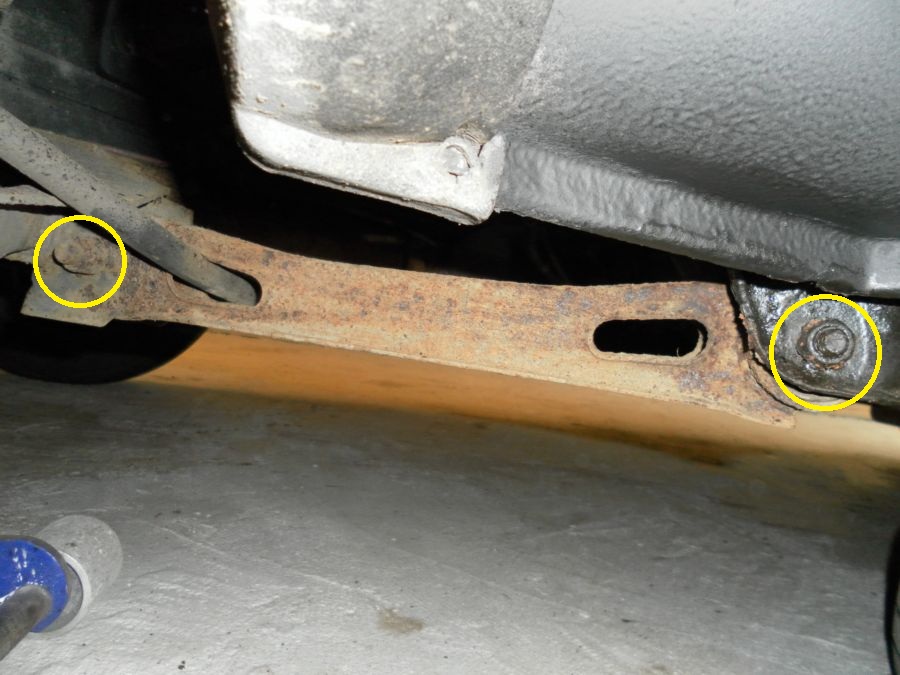
31/08. Actually the car wasn't ready. After I got all the suspension on I checked the trailing arms and they are both in a bad way. I had a feeling the bushes were on their way out as the car has always felt a little loose on the rear. So I went tonight and took the trailing arms off the French Panda. They are straight forward to take off, 17mm nuts and bolts as circled. The only thing is the handbrake cable has to be taken off the drum as it is fed through. Takes about 20mins to do one side.
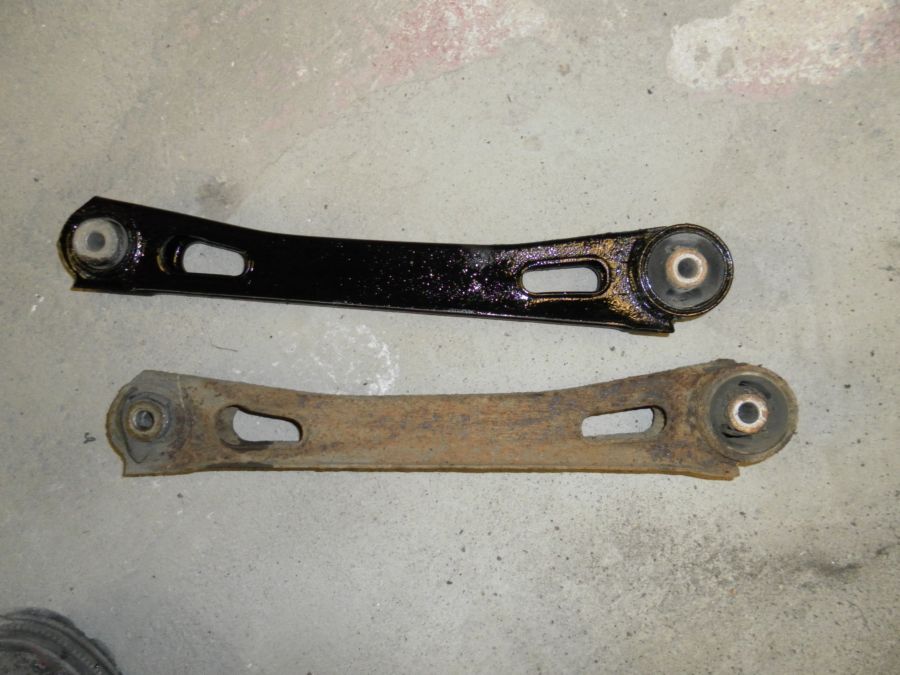
Once I had the good arms off I painted them just to tidy them up. You can see the bush coming apart on the old arm.
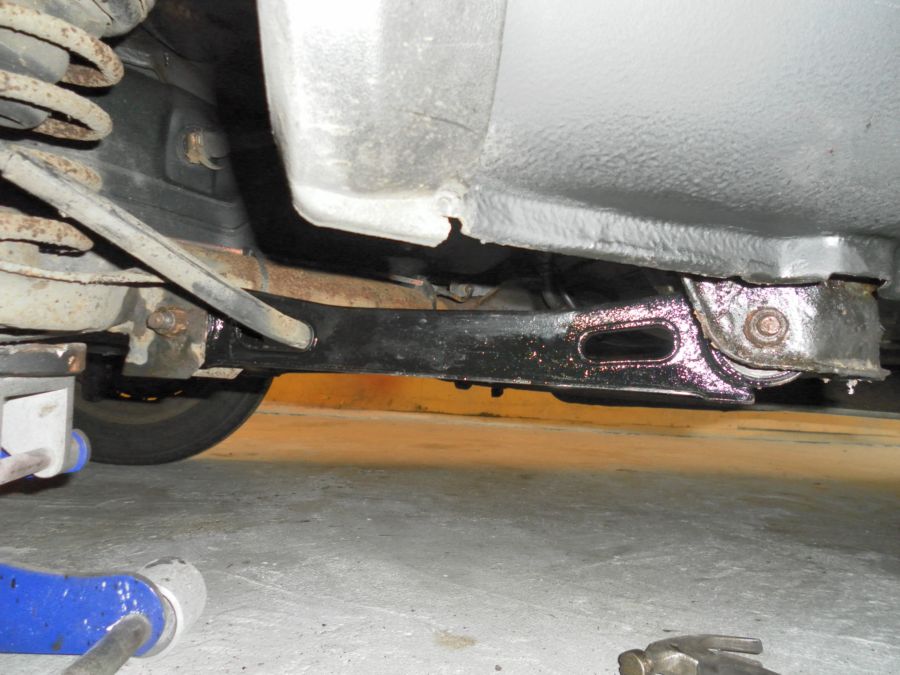
Then another 20mins had the replacements on. I've a slow puncture on the front passenger side so while getting that sorted I'm going to get my mate who owns the tyre place to do the tracking and set the headlights and that will be everything done, "I hope".
02/09. Mater as the kids have now named him went for MOT tonight and passed without a single issue. Tester even commented how clean he was underneath. Very pleased.
This photo didn't come out to well I'm afraid.